Pre-Purchase RV Inspection: The Complete Checklist
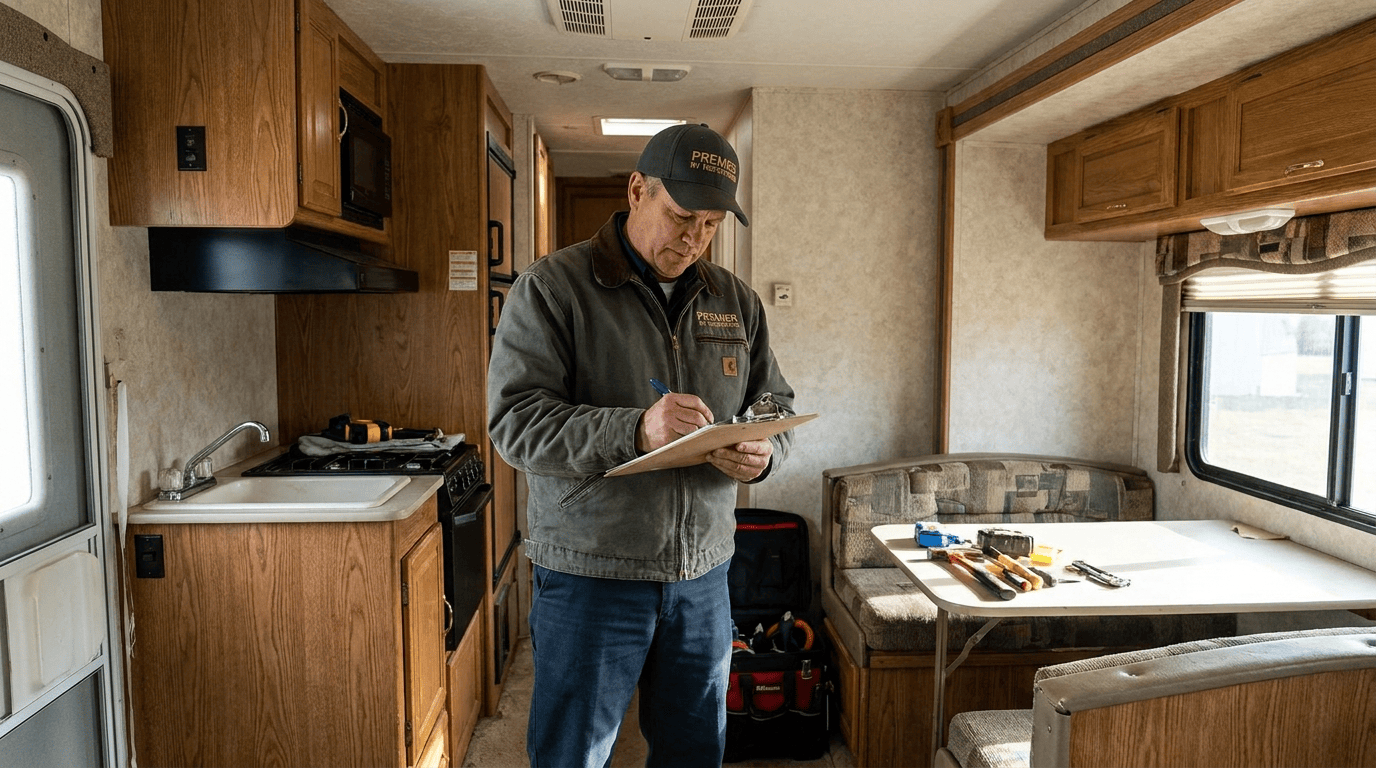
An RV is the second-largest purchase most people ever make, after their house. And unlike a house, it’s a house with an engine, plumbing, electrical system, roof, appliances, and multiple mechanical systems that all deteriorate at different rates — often invisibly.
The single biggest mistake in RV buying is skipping the pre-purchase inspection. It’s the same mistake as buying a home without an inspection, but with worse consequences: the RV can move, it wasn’t built to residential standards, and the repair costs on hidden damage can exceed the value of the rig within 18 months.
Meanwhile, the RV industry doesn’t help. Dealerships push to close fast. Private sellers highlight the good and hide the bad. YouTube walkthroughs oversimplify. And most first-time buyers don’t know what to look for or what to ask.
This guide walks you through what a real pre-purchase RV inspection covers, what to check yourself before you pay for a pro inspector, what a proper inspection should cost in 2026, and the deal-breakers that should have you walking away no matter how good the price looks.
Why Pre-Purchase Inspections Matter More Than You Think
The RV industry has a quality problem. Manufacturers rush units out to meet demand. Dealerships perform minimal pre-delivery inspections. Warranties are shorter than most owners realize. And the used market is flooded with RVs that were poorly maintained, water-damaged, or bought and sold multiple times.
A few uncomfortable numbers:
- A single hidden roof leak that’s been active for 12 months can cost $8,000–$15,000 to repair — often more than the price difference between a good rig and a bad one
- Delaminated walls from water intrusion are often not economical to repair
- Frame or chassis issues on motorhomes can total the rig
- A failed absorption refrigerator you don’t know is failing is a $2,000–$3,000 surprise in year one
- A slide-out with a damaged Schwintek wall channel is a $1,000–$2,000 fix that a walk-through won’t catch
A proper $400–$900 pre-purchase inspection routinely finds $5,000–$30,000 in issues that either drop the purchase price, force the seller to fix them, or give you the information to walk away.
The math on inspections is simple: they pay for themselves the vast majority of the time.
The Two Levels of Inspection
There are effectively two tiers of inspection to know about.
Level 1: Basic inspection (~$300–$500)
Visual and functional. Inspector walks through the rig, tests every system, documents findings with photos, and provides a written report. Covers what most buyers actually need for a mid-priced travel trailer or fifth wheel.
Level 2: Comprehensive / fluid analysis inspection (~$600–$900+)
Includes everything in Level 1 plus fluid sampling (engine oil, transmission fluid, coolant, generator oil), moisture meter readings on every wall and roof section, extended systems testing, and often chassis diagnostic scanning on motorhomes.
For any motorhome purchase, or any RV over $50,000, get Level 2. The additional $200–$400 catches issues that Level 1 won’t.
What a Real Inspection Covers
A legitimate NRVIA-certified inspection covers 400–500 individual checkpoints across every system in the rig. Here’s the full scope, organized by system.
Roof and Exterior
- Roof type identification (EPDM, TPO, fiberglass, aluminum)
- Membrane condition (blisters, tears, punctures, delamination)
- All roof penetration sealants (AC, vents, antenna, skylight)
- Front and rear cap seams
- Slide-out topper condition
- Sidewall seams and delamination check
- Front cap and windshield surround sealant
- Rear ladder and mounts
- Awning fabric, arms, and motor operation
- Slide-out awning (topper) condition
- Exterior storage bay seals
- LP tank compartment vents
- Baggage door seals and functionality
- Body flex and delamination check
- Fiberglass gel coat condition
- Decal condition and adhesion
Interior
- Ceiling stains and soft spots (water damage indicators)
- Wall soft spots and delamination
- Floor soft spots (especially near slides, bathroom, and entry door)
- All windows operate correctly and seal properly
- Window seals and any signs of past leaks
- Skylight and roof vent operation and seal
- Cabinet doors, drawers, and hinges
- Countertop condition
- Flooring condition throughout
- Furniture condition and function (recliners, jackknife sofas, dinette)
- Bed frame condition and mattress
- Interior lighting all functional
- Wall outlets tested with polarity tester
- USB outlets and 12V outlets tested
- Ceiling fans function on all speeds
- TV mounts and antenna function
- Fireplace operation (if equipped)
Plumbing
- Fresh water tank inspection and capacity
- Gray water tank operation and gate valves
- Black water tank operation and gate valves
- All faucets tested for pressure and hot/cold function
- Toilet flush and seal
- Shower operation, drain, and door/curtain
- Water pump operation and pressure
- City water inlet condition and check valve
- Water heater operation on both propane and electric
- Water heater tank inspection (rust, sediment, anode rod)
- Low point drains
- Water lines visible from bays (PEX condition)
- Winterization ability check
- Outdoor kitchen plumbing (if equipped)
- Outdoor shower operation
Electrical (12V and 120V)
- Shore power cord and plug condition
- Shore power connection at inlet
- Full 30A or 50A pedestal test
- Reverse polarity check
- Open ground check
- Main breaker and panel condition
- All 120V outlets tested (GFCI included)
- 12V system voltage under load
- Battery age, condition, and connections
- Battery bank capacity assessment
- Converter/charger function verification (charging voltage confirmed)
- Inverter function (if equipped)
- Automatic transfer switch operation
- Solar panels and charge controller (if equipped)
- All 12V circuits tested
- Surge protection (if equipped)
Propane
- LP tank condition, expiration date, and re-certification status
- Regulator condition and pressure test
- Leak test on all connections (soap solution or electronic sniffer)
- Propane detector operation and expiration date
- Stove and oven operation on all burners
- Furnace ignition and heat output
- Water heater on propane
- Refrigerator on propane
- Any auxiliary propane appliances
Appliances
Refrigerator:
- Type identification (absorption, residential, 12V compressor)
- Cooling verification on all power sources
- Interior condition (rust, cracks, ammonia smell)
- Door seal
- Age and any recall history
Air conditioner:
- Operation and cooling output measurement
- Amp draw test
- Filter condition
- Shroud condition
- Any indicators of past leaks
Furnace:
- Ignition
- Heat output at all vents
- Combustion air intake
- Exhaust condition
Microwave, stove, oven, washer/dryer:
- Function verification on all settings
Slide-Outs
- Extension and retraction on every slide
- Mechanism inspection (type, condition)
- Wall channel inspection (Schwintek systems)
- Motor and gear condition
- Slide topper condition
- Slide seal condition
- Wall attachment integrity
- Slide floor condition
- Any signs of past leaks around slide openings
Chassis and Drivetrain (Motorhomes)
- Engine oil and coolant condition
- Transmission fluid condition and level
- Power steering and brake fluid
- Battery condition and connections
- Belts, hoses, and general engine bay condition
- Air filter condition
- Chassis frame inspection for damage or rust
- Suspension components (leaf springs, air bags, shocks)
- Steering components (tie rods, drag link)
- Brake condition
- Tire condition and DOT age date on all tires
- Wheel and lug condition
- Exhaust system
- Fuel system leaks
- Chassis wiring
- Underbody protection
- Air brake system (if equipped)
Chassis and Drivetrain (Towables)
- Frame inspection for cracks or damage
- Axle condition and alignment
- Suspension components
- Brake magnets and wiring
- Tire condition and DOT age
- Wheel bearing condition
- Hitch (fifth wheel or ball) condition
- Coupler condition (travel trailer)
- Landing gear operation
- Stabilizer jacks
- Sway bar attachment points
Generator (If Equipped)
- Startup and shutdown
- Operating hours
- Oil condition and level
- Air filter condition
- Load test on multiple appliances
- Exhaust system condition
- Fuel supply and lines
Hydraulic Systems (If Equipped)
- Reservoir fluid level and condition
- Pump operation
- All cylinders function properly
- Any visible leaks at cylinders or lines
- Auto-level operation
- Manual override functionality
Documentation Review
- VIN verification against title
- Title status (clean, salvage, rebuilt, flood)
- Previous accident or damage history (Carfax equivalent when available)
- Manufacturer recall status
- Warranty transferability
- Maintenance records
- Manuals for all systems
That’s the scope. A real inspection produces a written report of 30–100+ pages with photos of every finding.
Your Own Pre-Purchase Walk-Through
Before you spend money on a professional inspector, spend 90 minutes doing your own walk-through. If you find anything major, you can either walk away without paying for an inspection, or use your findings to negotiate before ordering the inspection.
Before You Arrive
- Get the VIN and run a title check (states vary; some free, some paid)
- Look up manufacturer recalls at the manufacturer website using the VIN
- Search for the model year and floor plan on RV forums — known issues surface fast
- Check Carfax equivalent for motorhomes (NMVTIS reports available at nmvtis.gov)
- Look at listings for comparable rigs to understand fair market value
First Impressions (Exterior)
Walk around the rig slowly. Look at:
- Overall body condition. Straight lines? Any visible bulges, waves, or delamination on sidewalls? Delamination shows as ripples or bubbles in the fiberglass surface.
- Front and rear caps. Common failure points. Look for cracking, discoloration, or sealant issues at all cap seams.
- Slide-outs. Any visible damage to slide walls or seals? Any water staining around slide openings?
- Roof from the ground. You can’t see everything, but you can see obvious problems — dips (indicating rotten decking below), major sealant failures, missing components.
- Tires. Look at the DOT date code on every tire. RV tires expire at 5–7 years regardless of tread. Old tires are a purchase-price negotiation point.
- Bays and compartments. Open every one. Look at the ceiling of each compartment — this is often where roof leaks first appear.
On the Roof
If it’s safe to go up (and the seller permits it), get on the roof yourself with the seller present.
- Walk carefully — feel for soft spots. Any softness underfoot means rotten decking.
- Look at every penetration up close. Photograph sealant condition.
- Examine all seams — front cap, rear cap, sidewall.
- Look for previous repairs (patches, mismatched sealant, silicone use — silicone on an RV roof is a red flag).
- Check the AC shrouds for cracking.
- Look at the antenna and satellite mounts.
If you can’t get on the roof, use a ladder to inspect the edges and photograph the top with your phone raised high.
Interior Water Check
This is the most important part of your walk-through.
- Ceiling. Every square foot. Look for stains, discoloration, or bulging. Press ceiling material — should be solid.
- Around every window. Yellow or brown staining in the corners is a leak indicator.
- Slide corners and tops. Where slides meet the ceiling and where slide walls meet floors.
- Bathroom. Around the shower, toilet, sink, and skylight. Bathrooms hide water damage.
- Under the sinks. Feel for dampness. Check for staining.
- In cabinets, especially upper. Water travels down from the roof and appears in cabinets first.
- Behind furniture where possible. Some sellers position furniture to hide stains.
- Around the entry door frame. A common leak point.
Smell test. Musty odors indicate hidden moisture somewhere. If it smells like a wet basement, walk unless you’re prepared for major water damage.
Test Every System
You don’t need to be an inspector to check basic function. Ask the seller to have shore power connected and propane on.
Test in this order:
- Turn on every light and every switch. Note anything dead.
- Run water from every faucet. Hot and cold. Check pressure.
- Flush the toilet. Should hold water.
- Run the shower. Should have decent pressure.
- Turn on the water heater (both electric and propane if applicable). Wait 20 minutes and test hot water.
- Fire up the stove and oven on all burners.
- Start the refrigerator on all power sources. Cold air within an hour on propane, longer on 120V.
- Turn on the AC. Cold air within 5 minutes. Check for weird noises.
- Turn on the furnace. Warm air within 3 minutes.
- Test all slide-outs. Full extension and full retraction, both directions.
- Test awnings. Full extension and retraction.
- Test leveling jacks and hydraulic systems. Full extension.
- Test all outlets with an outlet tester ($10 tool).
- Test the generator if equipped. Run for 15 minutes under load.
- Take the motorhome for a test drive (if applicable). Feel for any drivetrain issues, listen for chassis noises, check brakes, note any warning lights.
Anything that doesn’t work is a negotiation point or a red flag.
Under the Rig
Get down and look:
- Frame condition (rust is normal on older rigs; structural cracks or bends are not)
- Underbelly condition (torn or hanging material?)
- Any visible plumbing leaks or repairs
- Tank condition where visible
- Any signs of animal damage (wiring, insulation)
- Suspension components on towables
- Chassis and drivetrain components on motorhomes
The Big Red Flags (Walk Away Signals)
Some findings should end the deal, no matter how good the price. These are the walk-aways.
Delaminated walls
If the sidewalls or slide walls show visible delamination (bubbles, waves, or lifting of the fiberglass from the substrate), the wall structure is compromised. This is almost never economical to repair. Walk away.
Soft spots on the floor
Any softness underfoot in the floor indicates water damage to the subfloor. On a small area near a bathroom or slide, sometimes repairable. Widespread softness? Walk away.
Musty smell that won’t clear
Hidden mold and rot somewhere. Even if you can’t find it visually, your nose is picking up damage you can’t see. Walk away.
Visible frame damage or repair on motorhomes
Frame welds, straightened members, or paint mismatch on structural components indicate previous accident damage. Get a frame specialist involved before proceeding.
Salvage or flood title
Automatic walk-away for most buyers. Water damage in a flooded RV is guaranteed to have entered every system. Insurance may not cover future issues. Resale is destroyed.
Refusal to allow inspection
Any seller (dealership or private) who refuses to allow an independent pre-purchase inspection is hiding something. Full stop. Walk away.
Multiple Norcold refrigerator recalls unaddressed
Norcold cooling unit fire risk recalls affect specific model ranges. If the recall repair hasn’t been performed, that’s a $2,000–$3,000 immediate expense at minimum, plus safety concern.
Schwintek slide with visible wall channel damage
If you can see scoring or metal shavings in the Schwintek wall channels, the channel needs replacement — a $600–$1,400 repair per slide. Multiple slides with this issue can total the rig economically.
Extensive silicone on the roof
Silicone caulk on RV membranes indicates amateur repair attempts. It doesn’t bond well, can’t be sealed over, and often means underlying leaks weren’t actually addressed. Investigate deeply before proceeding.
Yellow Flags (Negotiate or Investigate Further)
These aren’t automatic deal-breakers, but they require professional evaluation and should reduce the purchase price.
- Any active roof sealant failures (repairable but factor into negotiation)
- Old tires (immediate replacement cost)
- Old batteries (immediate replacement cost)
- Deferred maintenance evident from records or lack of records
- One or two dead 12V circuits (may be simple fuse issues or larger)
- Awning fabric replacement needed
- Furniture wear beyond normal
- Absorption fridge over 10 years old with no history
- Generator with high hours (over 2,000) on a motorhome
- No maintenance records provided
- Slide seal replacement needed
Each of these has a dollar cost. Get estimates, then negotiate.
Finding an NRVIA Inspector
The National RV Inspectors Association (NRVIA) certifies pre-purchase inspectors specifically. NRVIA certification means:
- Passed formal training and testing
- Uses standardized inspection procedures
- Carries appropriate insurance
- Provides written reports meeting industry standards
How to find one:
- Search NRVIA’s inspector directory at nrvia.org
- Ask the seller to allow the inspector of your choice — never the seller’s recommendation
- Look for inspectors with 100+ inspections completed
- Verify their reports include photos of every finding (should be standard)
- Verify insurance and licensing
What to ask an inspector before hiring:
- Are you NRVIA-certified? Current or lapsed?
- How many inspections have you completed?
- How long does the inspection take? (Should be 5–8 hours for a proper motorhome inspection.)
- Do you include fluid analysis? At what price?
- Do you provide a written report with photos of each finding?
- Can I be present during the inspection?
- Do you carry errors and omissions insurance?
- What’s your process if a critical issue is found?
The best inspectors want you present. It’s how you learn about your rig. If an inspector doesn’t want you observing, hire someone else.
What Pre-Purchase Inspections Cost in 2026
Realistic 2026 ranges:
| Inspection Type | Cost Range |
|---|---|
| Basic Level 1 (small travel trailer) | $250 – $400 |
| Basic Level 1 (fifth wheel or Class B/C) | $350 – $500 |
| Basic Level 1 (Class A) | $450 – $700 |
| Comprehensive Level 2 (any RV) | +$200 – $400 over Level 1 |
| Fluid analysis (separate lab work) | $100 – $250 |
| Chassis diagnostic scan (motorhomes) | $75 – $200 |
| Travel fee (if inspector is remote) | $50 – $300 |
Total realistic cost for a proper motorhome pre-purchase inspection with fluid analysis: $700–$1,200.
Total realistic cost for a proper travel trailer or fifth wheel inspection: $400–$700.
For a $50,000+ RV, spending $700 on an inspection to potentially save $5,000–$30,000 is not optional — it’s basic due diligence.
Should You Buy From a Dealership or Private?
Both have tradeoffs.
Dealership pros:
- Financing usually available
- Some limited warranty typically offered
- Consistent buying process
- Trade-in options
Dealership cons:
- Higher prices
- Pressure to close fast
- Often minimal PDI (pre-delivery inspection) performed
- Salespeople frequently misrepresent condition
- May try to prevent independent inspection
Private sale pros:
- Better pricing
- Direct information from owner
- Maintenance history usually available
- No sales pressure
- Full inspection access usually granted
Private sale cons:
- No warranty
- Financing harder to arrange
- No trade-in option
- Higher risk of undisclosed issues (but easier to inspect thoroughly)
For your first RV purchase, either can work if you inspect thoroughly. Experienced buyers often prefer private sales for the price and access to real ownership history.
Special Considerations by RV Type
Class A motorhomes
Focus on chassis, drivetrain, and generator hours. Fluid analysis is critical. Diesel pushers require chassis expertise (Freightliner, Spartan, Roadmaster) — some general RV inspectors don’t cover chassis. Hire a diesel mechanic separately if the inspector isn’t chassis-capable.
Class B/C motorhomes
Chassis is usually shared with commercial trucks or vans — easier to inspect and repair. Focus on house-side systems and any evidence of the coach being built on a fresh chassis vs. an aged one.
Fifth wheels
Focus on the frame at the pin box (stress point), slide mechanisms (usually multiple), and the hitch condition. Fifth wheels often have more slides than travel trailers, so more slide issues to check.
Travel trailers
Focus on frame at the tongue and axle mounts, tire condition (often neglected), and roof condition (biggest single failure point on trailers).
Truck campers
Focus on the corner tie-down points, jacks, and the seal between the camper and the truck bed. Also check truck payload capacity vs camper weight.
Park models
Similar checks to travel trailers, but often larger and heavier. Chassis often less robust because they weren’t designed for frequent transport.
Frequently Asked Questions
How much does a pre-purchase RV inspection cost?
$400–$700 for basic inspection on a travel trailer or fifth wheel. $700–$1,200 for a comprehensive motorhome inspection with fluid analysis. Larger and more complex rigs cost more.
Can I do the inspection myself instead of paying a professional?
You can and should do your own walk-through as a first pass, but a proper inspection requires equipment (moisture meters, thermal cameras, load testers, gauges) and training that most owners don’t have. The $500–$1,000 you spend on a professional inspection routinely finds $5,000–$30,000 in issues.
How long does a professional inspection take?
Travel trailer or fifth wheel: 4–6 hours. Motorhome: 5–8 hours. Comprehensive inspections with fluid analysis: 6–10 hours.
Should I be present during the inspection?
Yes, absolutely, if the inspector allows it. You’ll learn more about your future rig in those hours than in any other way. Any inspector who doesn’t want you present is hiding something or unwilling to answer questions.
What if the seller refuses to allow an inspection?
Walk away. This is non-negotiable. A refusal to allow independent inspection is a bright red flag that the seller knows about issues.
Can I use the inspection report to negotiate?
Absolutely. The report gives you specific findings, dollar values, and leverage. Common outcomes: seller reduces price to account for repairs, seller performs repairs before sale, or seller refuses and you walk. All three are acceptable outcomes.
Should I get an inspection on a new RV from a dealership?
Yes. New RVs come off the assembly line with significant defects surprisingly often — the RV industry has a well-documented quality problem. A pre-delivery inspection (PDI) by an independent inspector before you take delivery catches issues that would otherwise become warranty headaches. Cost: usually the same as any other inspection.
How do I find an NRVIA inspector in my area?
Visit nrvia.org and use their inspector locator. Verify certification is current. Read their reviews and ask for sample reports before hiring.
Does an inspection guarantee no future problems?
No. It confirms condition at time of inspection. Systems fail, materials age, and use causes wear. An inspection dramatically reduces the risk of buying a rig with pre-existing problems — but it doesn’t make the rig immune to future issues.
Can I get inspection findings included in the sales contract?
Yes. Any repair the seller agrees to should be documented in the contract with completion required before sale. Verbal agreements at RV sales evaporate.
Should I still do a title and history check even if I inspect?
Yes. Inspection and history check serve different purposes. Inspection covers current condition. Title check reveals liens, salvage status, and prior damage that may not be visible.
Bottom line: A pre-purchase RV inspection is the highest-ROI money you spend in RV buying. Skip it and you’re gambling with tens of thousands of dollars. Do it right and you either buy a great rig with confidence, buy a good rig at a fair price after negotiation, or walk away from a disaster before it becomes yours. There is no third option that ends well.
Need an NRVIA-certified inspector?
Search the RV Repair Lab directory for Lab-Vetted NRVIA inspectors in your area. Filter by RV type expertise and inspection tier offered.
[Find a certified RV inspector near you →]
In a hurry?
Skip the diagnostic → Find a mobile tech near you