RV Electrical Troubleshooting: 12V, 120V, and Inverter Guide
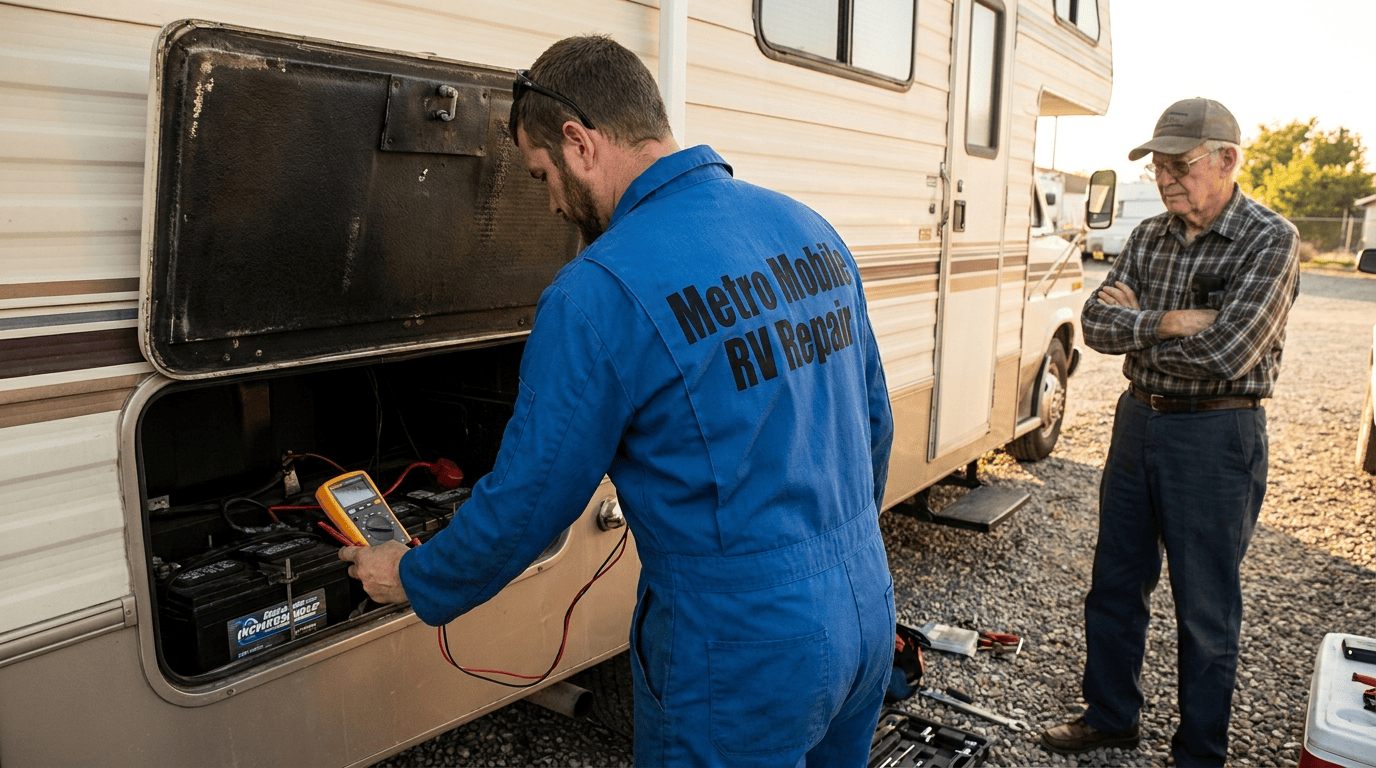
Nothing is working. Or half the things are working. Or your fridge runs on propane but the lights are dim. Or the outlets are dead but the ceiling fan works. Or you plugged into a new campground pedestal and now nothing turns on.
RV electrical problems are frustrating because they can look identical from the outside but come from completely different sources. A “dead” outlet might be a tripped GFCI, a failed converter, a low battery, a broken shore power connection, or a fried inverter — five different problems, five different repair paths, five different costs.
The single most important thing to understand about RV electrical: your rig has two electrical systems, and they interact. Get the wrong one in your head and you’ll troubleshoot for hours in the wrong place.
This guide walks you through both systems, how to figure out which one is actually failing, the diagnostic procedures that isolate the problem in about 30 minutes, and what real repair should cost in 2026.
The Two Systems (This Is the Foundation)
Every RV has:
12V DC system — powered by your house battery bank (or the tow vehicle battery when driving). Runs everything that needs to work when you’re boondocking or driving: lights, water pump, fans, thermostat, propane detectors, slide motors, jack motors, refrigerator control boards, radio, USB outlets.
120V AC system — powered by shore power (when plugged in), your generator (when running), or an inverter (converting battery power to AC). Runs the “household” appliances: microwave, TV, air conditioner, standard wall outlets, residential refrigerator, coffee maker, hair dryer.
The two systems connect at:
- The converter (converts 120V AC shore power into 12V DC to charge batteries and run 12V loads)
- The inverter (converts 12V DC battery power into 120V AC to run wall outlets when boondocking)
- Some rigs have a combined inverter/charger that does both
Understanding this is 80% of RV electrical troubleshooting. Once you know which system is failing, the diagnostic path becomes obvious.
The First Diagnostic Question: Which System?
Before you touch a multimeter, answer this question.
Look at what’s not working and match it to the system:
12V DC failure (battery-side problem):
- Interior LED lights are dim, flickering, or off
- Water pump won’t run
- Ceiling fans not working
- Slide-out or jacks won’t operate
- Refrigerator control panel is dead (even when on propane)
- Propane detector chirping (low voltage warning)
- Radio won’t power on
- Nothing works at all when boondocking
120V AC failure (shore power/inverter-side problem):
- Wall outlets are dead (but 12V stuff works)
- Microwave won’t run
- Air conditioner won’t start
- Only some outlets dead (partial circuit failure)
- Residential fridge stopped cooling (but propane fridge would keep working)
- TV won’t power on
- Everything worked yesterday, dead today after plugging in
Both systems failing:
- Nothing works at all, no lights, no outlets
- Battery is completely drained and shore power isn’t connected properly
Sometimes symptoms overlap because the converter or inverter is failing. But start by categorizing the symptom. That determines which chapter of the diagnostic you’re in.
Understanding Your Power Sources
Shore power (30A or 50A)
Your primary source when parked. Comes from campground pedestals or home outlets. 30A shore power delivers 3,600 watts; 50A delivers 12,000 watts (across two 120V legs). Older rigs and travel trailers usually run 30A; larger fifth wheels and Class A motorhomes usually run 50A.
Generator
Onboard or portable. Provides 120V AC when boondocking. Typical outputs: 3,000W–10,000W depending on unit.
House batteries
Deep-cycle batteries dedicated to 12V loads. Lead-acid, AGM, or lithium (LiFePO4). Capacity measured in amp-hours (Ah). Runs everything 12V, plus feeds the inverter when boondocking.
Solar
Charges the house batteries via a solar charge controller. Doesn’t run 12V loads directly — it just refills the battery bank.
Inverter
Converts battery DC to AC. Sizes range from 300W (small pure sine for a laptop) to 3,000W+ (whole-coach systems). Runs some or all of the 120V AC circuits when off shore power.
Converter / Charger
Converts shore power AC to DC to charge the batteries and run 12V loads. Common brands: Progressive Dynamics, WFCO, Parallax. Failure of the converter causes the batteries to slowly drain even while plugged in.
12V DC Troubleshooting
If your 12V system isn’t working, the problem is almost always one of five things. Work through them in order.
1. Battery voltage under load
The #1 cause of 12V problems is a battery that reads okay at rest but collapses under load.
Procedure:
- With a multimeter set to DC volts, check battery voltage with everything off. Should read 12.6V+ for lead-acid or 13.0V+ for lithium at rest.
- Turn on water pump or slide motor (something with real draw). Watch voltage.
- If voltage drops below 11.5V under load, the battery is failing or discharged.
Common causes:
- Old battery that no longer holds charge
- Battery bank drained from parasitic loads (lights left on, propane detector running 24/7 for months in storage)
- Corroded terminals reducing effective capacity
- Bad cell in one battery of a bank
Solutions:
- Charge the batteries (shore power, generator, or dedicated charger)
- Clean and tighten terminals
- Load test batteries individually
- Replace batteries if they don’t hold charge after full recharge
Battery voltage is the first thing to check on any 12V problem. Skip this and you’ll troubleshoot in the wrong place for hours.
2. Blown fuses
Every 12V circuit is protected by a fuse. Blown fuses are extremely common and dead simple to check.
Procedure:
- Locate the 12V fuse panel (usually in a coach cabinet, wardrobe, or bay).
- Check each fuse visually — a broken filament means it’s blown.
- Or use a fuse tester or multimeter to test continuity through each fuse.
- Replace with exact same amperage rating.
If a new fuse blows immediately:
- You have a short circuit downstream. Don’t keep replacing fuses. Find the short before continuing.
Common blown fuse causes:
- Overloaded circuit (too much drawn on one line)
- Damaged wiring somewhere in the circuit
- Failed appliance shorting internally
- Water intrusion in a compartment
3. Ground connections
Every 12V circuit has a positive and a ground return. Corroded, loose, or missing grounds cause dozens of weird symptoms — dim lights, flickering, intermittent function, seemingly random failures.
Procedure:
- Check the negative battery cable at the battery post and where it connects to the chassis.
- Check ground bus bars if you can access them.
- Look for corrosion (green or white powder) on any ground connection.
Common causes:
- Corrosion on the battery negative terminal
- Loose chassis ground bolt
- Old crimped connections coming loose over time
- Rodent damage to wiring
Ground problems cause more head-scratching than any other 12V issue. Always check grounds.
4. The 12V distribution panel
Your rig has a central point where 12V power distributes to all circuits. Usually near the battery bank or converter.
What to check:
- Main 12V circuit breakers (many rigs have a large 40A or 60A breaker at the panel)
- Battery disconnect switch (make sure it’s on — sounds obvious, but new owners flip it and forget)
- Any master fuses on the DC side
Common causes of full 12V failure:
- Battery disconnect off
- Tripped main breaker
- Blown main fuse
5. Individual component failures
If you’ve confirmed:
- Battery voltage is good under load
- Fuses are intact
- Ground connections are clean
- Distribution panel is powered
…then the failure is in an individual device — a specific light, switch, or appliance. That’s a component-level repair.
120V AC Troubleshooting
If your 120V AC system isn’t working, work through this sequence.
1. Confirm you have shore power at the source
Sounds obvious, but plenty of “dead RV” calls turn out to be a campground pedestal with a tripped breaker.
Procedure:
- With a voltage tester or outlet tester (a $10 tool every RVer should own), test the pedestal outlet before plugging in.
- Confirm you have proper voltage (should read 108V–130V on a 30A or 50A outlet).
- Check that both hot legs are live on a 50A pedestal.
- Check ground continuity.
Common causes:
- Pedestal breaker tripped (reset at the pedestal, not your RV)
- Pedestal has been miswired (campgrounds do this)
- Low voltage from an overloaded park circuit
- Wrong adapter used
Never plug in without testing. Reversed polarity and open ground conditions can damage your electronics silently.
2. Check your surge protector
If you have a surge protector (you should — Progressive Industries EMS or Surge Guard), it may be blocking bad power. Read the fault codes.
Common surge protector faults:
- Open ground at pedestal
- Reversed polarity
- Low voltage (below 104V typically)
- High voltage (above 132V typically)
- Open neutral
If the surge protector shows a fault, it’s protecting your rig from bad shore power. Don’t bypass it — fix the pedestal issue or move sites.
3. Check your main breaker
Your RV has a main circuit breaker at the AC distribution panel. This is separate from individual circuit breakers.
Procedure:
- Open the AC panel (usually a metal door in a cabinet).
- Confirm the main breaker is fully on. If tripped, it’ll be halfway between on and off — flip it completely off then fully on.
4. Check individual circuit breakers
Each 120V circuit has its own breaker. Common circuits: microwave, AC, GFCI outlets, kitchen outlets, living room outlets.
Procedure:
- Identify the breaker for the non-working circuit.
- Check position. If tripped, reset by flipping fully off, then on.
- If it trips immediately again, you have a short or overload. Don’t keep resetting.
5. Check GFCI outlets
This is the #1 undiscovered cause of “dead outlet” problems.
GFCI (Ground Fault Circuit Interrupter) outlets protect entire circuits, and when they trip, every outlet downstream on that circuit goes dead — including outlets in other rooms.
Procedure:
- Find the GFCI outlet (usually in the bathroom or kitchen — the outlet with “Test” and “Reset” buttons).
- Press “Reset.” If it clicks and stays in, you may have solved the problem.
- If it won’t reset, either the GFCI is faulty or there’s a genuine ground fault somewhere on the circuit.
Many RVers have paid techs to diagnose “dead outlets” when a bathroom GFCI was tripped. Always check the GFCI first.
6. Check the transfer switch (if generator-equipped)
If your rig has a generator, an automatic transfer switch (ATS) chooses between shore power and generator. A failed ATS can leave the coach dead from both sources.
Symptoms of failing ATS:
- Works on shore power but not generator (or vice versa)
- Intermittent AC power
- Clicking sounds from the transfer switch area with no output
Transfer switch replacement is usually a pro job — $300–$800 in parts, similar in labor.
Inverter Troubleshooting
Inverters convert 12V DC to 120V AC. When they fail, symptoms are specific.
Common inverter problems
Inverter won’t turn on:
- Battery voltage too low (most inverters cut out below 10.5V)
- Blown fuse on the DC input to the inverter (often a large 200A+ fuse near the battery bank)
- Failed remote control switch (if remotely controlled)
- Internal failure
Inverter turns on but no AC output:
- Overload trip (drew more than rated capacity)
- Overheating (fans blocked or ambient temperature too high)
- Internal component failure
Inverter runs but appliances misbehave:
- Modified sine wave inverter powering equipment that requires pure sine wave — common with medical equipment, some laptops, CPAPs
- Voltage regulation failing
- Inverter undersized for the load
Inverter clicks or beeps repeatedly:
- Low battery voltage (chirping alert)
- Overload cycling
- Cooling fan failure triggering thermal shutoff
Inverter diagnostic sequence
- Check battery voltage. Below 11V and most inverters won’t function properly.
- Check the DC fuse to the inverter. Usually a large ANL or MEGA fuse near the battery bank. If blown, don’t just replace — figure out why it blew.
- Check for overheating. Feel the inverter case. Very hot inverters often have a thermal shutoff engaged. Improve ventilation or reduce load.
- Test with a small load. Try running just one appliance. If it works, your issue is overload, not the inverter itself.
- Check the remote panel/switch. Sometimes the switch fails, not the inverter.
Failed inverters usually mean replacement, not repair. Modern pure-sine inverters aren’t user-serviceable inside.
Converter Troubleshooting
The converter charges your batteries and runs 12V loads while plugged into shore power. When the converter fails, batteries slowly discharge even while plugged in.
Symptoms of converter failure
- Batteries dying while plugged into shore power
- 12V lights dim over hours even on shore power
- Converter humming loudly (fan running constantly)
- Burning smell from the converter area
- No 13.5V+ at the batteries when on shore power (should charge to 13.6–14.5V)
Converter diagnostic
- With shore power connected, measure voltage at the battery terminals. Should read 13.5V or higher.
- If voltage is at battery level (12.6V or below) even on shore power, the converter isn’t charging.
- Check the converter’s own fuses — most converters have internal fuses.
- Listen to the converter. Some clicking and fan noise is normal. Loud humming, buzzing, or hot smell isn’t.
Converter replacement runs $300–$900 in parts plus 1–3 hours of labor. Modern replacements (Progressive Dynamics 4600 series, WFCO, etc.) are more efficient than older units — a good upgrade even when your old one still works.
Batteries: What Type Matters
The battery technology in your rig affects everything electrical.
Flooded lead-acid
Traditional golf-cart or marine-deep-cycle batteries. Cheapest, heaviest, require maintenance (water levels). Discharge to 50% max for longevity. Common in older rigs.
AGM (Absorbed Glass Mat)
Sealed lead-acid, no maintenance, better performance than flooded. More expensive. Common in mid-range rigs from the last decade.
Lithium (LiFePO4)
The new standard for serious RVers. Lightweight, deep discharge capable (down to 20% safely), long life (2,000+ cycles), fast charging. Expensive up front but the total cost of ownership over 10 years often beats lead-acid.
Common lithium considerations:
- Requires a compatible converter/charger — old chargers can damage lithium
- Low-temp cutoff (most lithium won’t charge below 32°F)
- Needs Battery Management System (BMS) — usually built into modern lithium batteries
- Total capacity feels bigger than lead-acid Ah rating suggests because usable capacity is higher
If you upgraded to lithium and things stopped working right, your converter may not be lithium-compatible. Confirm before assuming battery failure.
Solar Systems: The Basics
Solar doesn’t power the RV directly — it charges the batteries via a charge controller. If your solar isn’t working:
Check the panel. Clean it. Panels lose 20%+ output when dirty.
Check the charge controller. Should show incoming solar voltage and outgoing battery voltage. If no readings, either no panel input or controller failure.
Check panel wiring. Loose connections at panel or controller are common.
Check for shading. Even partial shade on one panel dramatically reduces output on the whole array (for series-wired panels).
Solar troubleshooting is its own topic — but for basic diagnostics, that sequence catches most issues.
What Electrical Repair Costs in 2026
Costs vary by scope. Realistic 2026 ranges:
| Repair | Parts | Labor | Total |
|---|---|---|---|
| Fuse replacement (with diagnostic) | $5 – $30 | $100 – $200 | $105 – $230 |
| GFCI outlet replacement | $25 – $60 | $80 – $150 | $105 – $210 |
| Circuit breaker replacement | $30 – $100 | $100 – $200 | $130 – $300 |
| Standard 120V outlet replacement | $20 – $50 | $80 – $150 | $100 – $200 |
| 12V light fixture replacement | $30 – $150 | $80 – $200 | $110 – $350 |
| Battery replacement (single lead-acid) | $150 – $300 | $50 – $100 | $200 – $400 |
| Battery bank replacement (2x AGM) | $500 – $1,000 | $100 – $200 | $600 – $1,200 |
| Lithium battery upgrade (single 100Ah) | $600 – $1,400 | $100 – $250 | $700 – $1,650 |
| Full lithium bank (400Ah) with wiring | $2,000 – $4,500 | $500 – $1,200 | $2,500 – $5,700 |
| Converter replacement | $300 – $900 | $200 – $500 | $500 – $1,400 |
| Inverter replacement (2000W pure sine) | $600 – $1,500 | $300 – $700 | $900 – $2,200 |
| Inverter/charger combo (3000W) | $1,500 – $3,500 | $500 – $1,200 | $2,000 – $4,700 |
| Automatic transfer switch replacement | $250 – $600 | $300 – $700 | $550 – $1,300 |
| Surge protector installation (permanent) | $300 – $700 | $200 – $500 | $500 – $1,200 |
| Solar system installation (400W) | $800 – $2,000 | $500 – $1,500 | $1,300 – $3,500 |
| Whole-coach rewiring (partial section) | $300 – $1,500 | $800 – $3,500 | $1,100 – $5,000 |
| Diagnostic-only visit (electrical) | $0 – $50 | $150 – $400 | $150 – $450 |
Mobile techs handle most electrical work — they don’t need lifts, just meters and hand tools. Complex projects like lithium conversions and solar installs often go to shops with more space.
Safety: What to Never DIY
RV electrical is more forgiving than household electrical because 12V DC is low-voltage. But 120V AC in an RV can kill you the same as any house circuit.
Do NOT DIY:
- Any work on the shore power inlet or main panel while shore power is connected
- Any work inside a live inverter (can hold dangerous charge even when off)
- Battery bank work without disconnecting first (a wrench across battery terminals will weld itself)
- Any work you’re not fully confident on
Battery safety specifically:
- Always disconnect batteries before major electrical work
- Never smoke or spark near flooded lead-acid batteries (hydrogen gas)
- Wear eye protection when working near batteries
- Have baking soda nearby for acid spills
- Lithium batteries: follow manufacturer procedures for BMS reset and disconnect
Grounding warnings:
The RV chassis is bonded to the shore power ground. If that bond is bad or if the pedestal has open ground, touching the RV skin can shock you. This is why testing pedestals matters.
When to DIY vs When to Call a Pro
DIY-friendly:
- Fuse replacement
- GFCI reset
- Circuit breaker reset
- Basic multimeter testing
- Battery voltage checks
- Cleaning corroded terminals
- Simple outlet replacement (with shore power disconnected)
Pro territory:
- Any diagnosis that leads back to the main panel or inverter
- Converter replacement (integration with battery bank matters)
- Inverter installation or replacement
- Lithium battery conversion (charger compatibility, BMS setup)
- Solar system installation (roof work + electrical)
- Automatic transfer switch replacement
- Whole-coach rewiring
- Anything involving the shore power inlet
The line between DIY and pro on electrical is sharper than most RV systems because mistakes create fire and shock risk. When in doubt, call a tech.
Frequently Asked Questions
Why do all my outlets suddenly stop working when I plug into a new campground?
Most common cause: the pedestal has an issue (tripped breaker, low voltage, reversed polarity) and your surge protector is blocking bad power. Check the surge protector’s fault light first. If no surge protector and outlets are dead, check the main and GFCI breakers.
How can I tell if my converter is bad?
Measure battery voltage with the RV plugged into shore power. Should read 13.5V or higher (charging voltage). If it reads at rest voltage (12.6V or below) despite being plugged in, the converter isn’t charging. Confirm with a multimeter — don’t rely on the battery indicator panel in the RV, which is often inaccurate.
My inverter has red lights and won’t turn on. What’s wrong?
Usually one of three things: battery voltage too low (charge the batteries), blown DC input fuse (often a large fuse near the battery bank), or internal failure. Check the fuse before assuming the inverter is dead.
How long should RV batteries last?
Flooded lead-acid: 3–5 years with good maintenance. AGM: 5–7 years. Lithium (LiFePO4): 10–15 years with 2,000–5,000 cycles depending on quality. Poor charging habits (deep discharges, undercharging, extreme temperatures) cut all of these significantly.
Should I upgrade to lithium batteries?
Depends on your usage. Full-timers, boondockers, and anyone with significant off-grid time benefits from lithium. Occasional campers with mostly shore power may not recoup the investment. Also confirm your converter/charger is lithium-compatible before upgrading — old chargers can damage lithium batteries.
Do I really need a surge protector?
Yes. Full stop. A $300 surge protector protects tens of thousands in electronics from bad shore power. Campground pedestals are notoriously miswired and voltage-unstable. If you value your electronics, use a proper EMS (Electrical Management System) surge protector like Progressive Industries or Surge Guard.
Why is my inverter beeping every few seconds?
Almost always low battery voltage. The inverter is warning that voltage is approaching cutoff. Charge the batteries or reduce load.
Can I run my air conditioner on my inverter?
Depends on your inverter and battery bank. Rooftop RV air conditioners draw 1,500–2,500 watts continuous, so you need at least a 2,000W (better 3,000W) pure sine inverter and a battery bank sized to sustain that draw. Realistic: even with a well-configured setup, running AC on batteries alone limits you to a few hours before recharging.
Why do my lights get dim when I use the water pump?
Battery voltage sags under load. Either your batteries are aged and can’t maintain voltage under demand, or your wiring has a poor connection somewhere in the return path. Load-test the batteries and check ground connections.
What size generator do I need for my RV?
For 30A rigs: 3,000–4,000W is adequate. For 50A rigs: 6,500–10,000W depending on how many AC units and appliances run simultaneously. Undersized generators trip on startup surges from air conditioners.
Bottom line: RV electrical troubleshooting comes down to which of the two systems is failing. Once you know that, the diagnostic path is straightforward. Most owner-facing problems trace back to five root causes: dead battery, tripped GFCI, blown fuse, bad shore power, or failed converter. The other 5% requires a tech. Learn the fundamentals and you’ll save thousands over the life of your rig.
Electrical problem beyond DIY?
Search the RV Repair Lab directory for Lab-Vetted mobile techs and shops that specialize in RV electrical work, lithium conversions, inverter installation, and solar systems. Filter by RV type and system specialization.
[Find an electrical specialist near you →]
In a hurry?
Skip the diagnostic → Find a mobile tech near you