
RV Roof Leak Repair: EPDM, TPO, and Fiberglass Guide
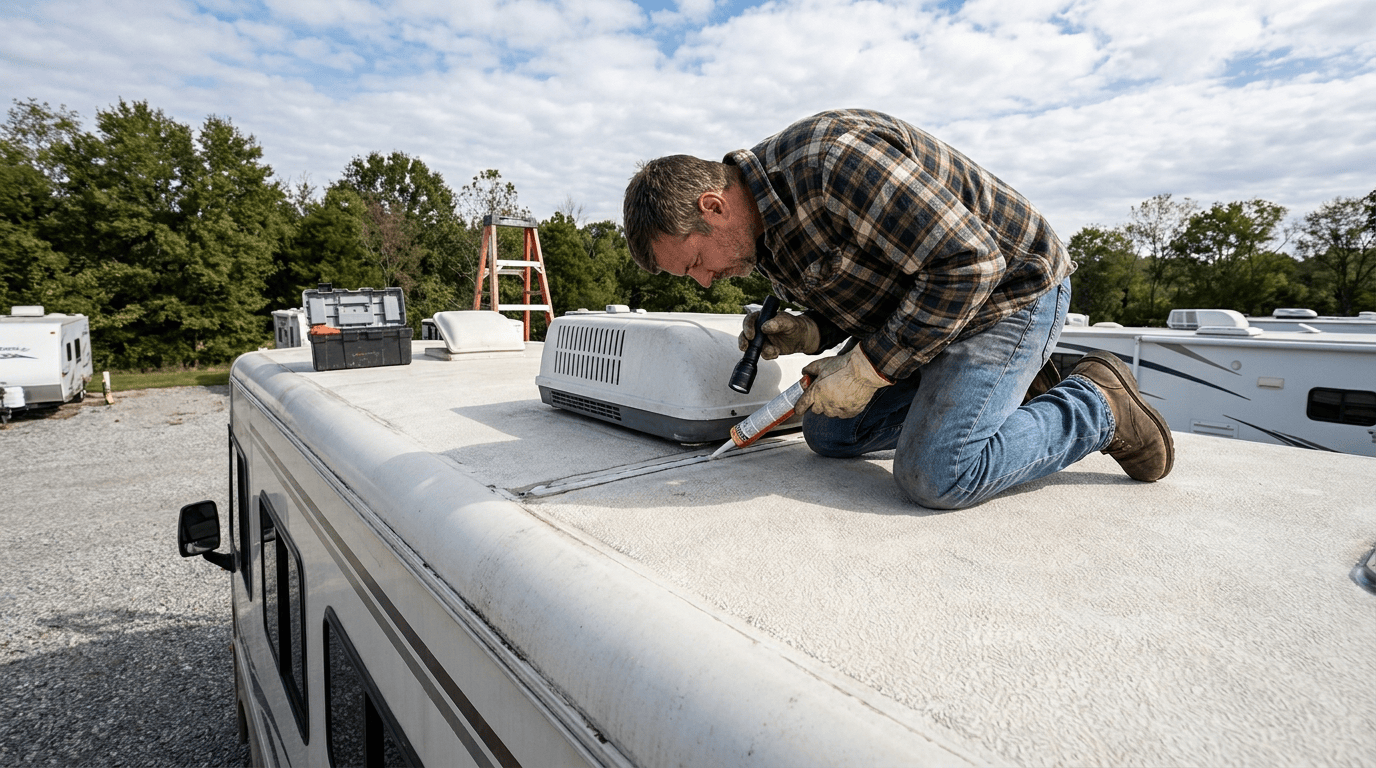
A water stain on your ceiling isn’t a small problem. It’s a countdown.
An RV roof leak that goes unaddressed for 12–18 months doesn’t just damage the roof — it rots the decking, delaminates the walls, ruins insulation, and can total a $60,000 rig. The RV industry knows this. It’s why “water damage” is the single biggest reason otherwise-solid used RVs get scrapped or sold for pennies on the dollar.
The good news: catching a roof problem early is one of the cheapest wins in RV ownership. A $30 tube of Dicor and a 15-minute inspection twice a year prevents almost everything. The bad news: most owners don’t inspect their roof until they see water stains inside, and by then the damage extends far beyond the leak point.
This guide walks you through identifying your roof type, inspecting it correctly, spotting leaks before they become disasters, choosing between sealant options that actually work, and knowing what repair should cost in 2026.
First: Know What Kind of Roof You Have
Four roof types are common in RVs, and they behave completely differently. Look at your roof before you buy any product.
EPDM rubber (most common in travel trailers and fifth wheels, ~2000–2020)
Black rubber membrane, usually appearing gray or off-white after weathering. Flexible, forgiving to walk on, and relatively easy to repair. If your rig is a mid-range travel trailer or fifth wheel from the last 20 years, this is probably what you have.
Identification: touch it. EPDM feels like a matte rubber sheet, with slight texture but not slick. Water beads off, but the surface always feels a bit chalky when dry.
TPO (thermoplastic polyolefin — increasingly common in newer rigs, 2015+)
White or light-colored membrane, smoother and slicker than EPDM. More UV-resistant than EPDM but slightly more delicate to repair (welded seams instead of mechanical seals). Most new RVs from major manufacturers now use TPO.
Identification: shinier surface, feels smoother and more plastic-like than EPDM. Sometimes has a subtle grid pattern from the manufacturing process.
Fiberglass (Class A motorhomes, high-end fifth wheels)
Solid one-piece fiberglass shell, gel-coated. Firmer to walk on, longest lifespan of any RV roof type, but repairs require different products and skills. Common in Class A diesel pushers, high-end fifth wheels, and some Class C motorhomes.
Identification: hard, glossy surface like a boat hull. No membrane texture. When you tap it, you get a solid sound rather than the softer sound of membrane roofs.
Aluminum (older Airstreams, some vintage RVs, some current park models)
Metal panels, either riveted or seamed. Different repair approach entirely — leaks are usually at seams, rivets, or where the aluminum meets other materials. Not covered in depth here since the repair methods are specialized.
Not sure? Your owner’s manual specifies the roof type. Or take a photo of your roof from a ladder and check it against images online. Or ask any RV shop or mobile tech — they’ll identify it in five seconds.
Getting the roof type right matters because using the wrong sealant will make things worse. Dicor lap sealant on TPO isn’t a great match. Fiberglass repair requires resin and gel coat, not membrane products. Match the product to the material.
The 15-Minute Roof Inspection That Prevents $8,000 Repairs
Do this every spring and every fall. Do it before every long trip. Do it after any severe weather event — hail, high winds, ice storms.
Equipment needed:
- Sturdy ladder that reaches your roof safely
- Bright flashlight (yes, even in daylight — sun creates shadows that hide problems)
- Phone camera for documentation
- Rag for wiping surfaces
Safety first: Never walk on a roof you’re not sure will support your weight. TPO and EPDM roofs usually support 250 lbs distributed weight, but decking beneath can rot silently. If you’re a bigger owner or your rig is older, inspect from the edge or with a spotter.
The inspection sequence:
1. All roof penetrations first.
Every hole in the roof is a potential leak source. Walk (or scan) every one and look closely at the sealant around:
- Air conditioner shrouds and gaskets
- Vents (both roof vents and appliance vents)
- Antennas and satellite mounts
- Skylights
- Solar panel mounts
- Refrigerator vent
- Shower skylight
- Awning brackets (top mount)
- Slide-out toppers (mounting points)
You’re looking for: cracked or peeling sealant, hairline gaps, brown/black stains streaking from the penetration, or lifted edges where sealant is pulling away.
2. All seams and edges.
The seam where the roof membrane meets the sidewalls. The front cap. The rear cap. Every seam is sealed at manufacture and every seam eventually needs re-sealing.
Look for: cracking, gaps, discoloration, or areas where the sealant has become thin or brittle.
3. The membrane itself (EPDM/TPO only).
Walk the entire roof surface (safely) or scan carefully from a ladder. Look for:
- Punctures or tears
- Blisters or bubbles under the membrane (indicates water infiltration below)
- Areas where the membrane is peeling or delaminating from the substrate
- Fading and chalking (normal weathering; not a leak but signals aging membrane)
- Small dark spots (mold or algae, usually surface only)
- Any visible cuts from tree branches, road debris, or tool marks
4. Inside inspection.
Now go inside and look at the ceiling with your flashlight. Look for:
- Any brown or yellow stains (past or current leaks)
- Soft spots on the ceiling (press firmly — should be solid)
- Visible discoloration around vents, AC units, or skylights
- Wallpaper or ceiling material peeling near the edges
- Musty smell (mold from moisture)
5. In storage areas.
Open front pass-through storage and any exterior compartments. Look at the ceiling of each — this is often where leaks show up first because the compartments have thin ceilings.
6. Behind slide-outs.
The seals at the top of slide-outs are common leak points. Retract the slides, then inspect the roof area where they seat when retracted.
7. Around windows and skylights (from inside).
Look at the trim around every window and skylight. Water stains around windows often indicate roof leaks that traveled down the walls, not window leaks themselves.
Document everything. Take photos of anything that looks questionable. Compare to next inspection’s photos. You’ll spot deterioration you’d otherwise miss.
If you find nothing concerning, you’ve spent 15 minutes protecting a $60,000 asset. If you find something, you’ve caught it before it became a disaster.
Symptoms and What They Mean
Water stain on the ceiling
Something is leaking, right now or recently. Locate the source before you address the stain. The leak is often several feet uphill of where the stain appears — water travels along framing before dropping.
Soft or spongy ceiling
Extended water damage. The decking underneath is rotten. This is no longer a sealant repair — it’s a structural repair.
Bubbles or blisters on membrane roof
Water has infiltrated between the membrane and the decking. The decking may still be dry, or it may be soaked. Either way, the membrane bond is compromised and the area needs professional evaluation.
Musty smell inside
Hidden moisture somewhere. Could be roof, could be plumbing, could be a slide seal. Investigate.
Sealant is cracked or peeling around a penetration
Not yet leaking, or leaking slowly. Address it immediately — this is the cheap window before it becomes expensive.
Delaminated walls
Water has traveled from the roof, down the walls, and separated the wall panel from the framing. This is one of the most expensive repairs in RV ownership — often not economical to fix and a common reason older rigs get scrapped.
Fiberglass roof: cracks, crazing, or gel-coat damage
Fiberglass doesn’t leak the way membranes do, but cracks in the gel coat let water into the fiberglass structure. Repair requires resin work, not sealant.
The Water Damage Progression Timeline
Understanding what water damage does over time is what motivates owners to inspect. Here’s the timeline:
Month 1–3 of a small leak: Water enters, wicks along framing, no visible damage. Nothing on the ceiling yet. Only detectable via inspection.
Month 3–6: Water saturates the roof decking underlayment. Small brown ceiling stain appears near the leak point. Wood begins to soften. Damage still repairable at moderate cost.
Month 6–12: Decking begins to rot. Walls may show first signs of delamination near affected area. Ceiling stain enlarges. Musty smell develops. Damage is now significant — repair costs escalate rapidly.
Month 12–18: Structural decking failure. Wall delamination visible from outside. Ceiling material sags or falls. Insulation compromised. Slide seals may fail. Repair may exceed rig’s value.
Beyond 18 months: Structural integrity compromised. Frame corrosion possible. Rig may be economically totaled.
The delta between a $30 tube of sealant caught at month 1 and a $15,000 repair at month 12 is enormous. This is why inspection is the single highest-ROI activity you can do as an RV owner.
Sealants: What Works and What Doesn’t
The right sealant depends on your roof type and the specific repair. Using the wrong product turns a small problem into a bigger one.
Dicor Self-Leveling Lap Sealant
The industry standard for horizontal EPDM and TPO surfaces (roof penetrations, seams). Self-levels for a smooth finish. White, dries to a slightly rubbery texture. Available at any RV store and Amazon.
- Best for: sealing around vents, AC units, antennas on EPDM or TPO roofs
- Not for: vertical surfaces (it’ll run), fiberglass (bond can be inconsistent)
- Cost: $8–$15 per tube
Dicor Non-Sag Lap Sealant
Same chemistry as self-leveling, but thicker consistency for vertical surfaces (sidewalls, corners, front/rear cap edges).
- Best for: side seams, cap edges, anywhere vertical
- Cost: $8–$15 per tube
Eternabond Tape
Peel-and-stick membrane tape that’s astonishingly durable. Not really a “sealant” — it’s a repair membrane. Bonds permanently to most surfaces. Widely considered the best emergency and long-term seam repair on the market.
- Best for: covering cracks, tears, or damaged seams; emergency roof repair
- Multiple widths (2″, 4″, 6″) for different applications
- Cost: $25–$60 per roll (small rolls cover a lot)
Popular tip: keep a roll of Eternabond in your rig at all times. It’s the most reliable emergency repair for a mid-trip leak.
ProFlex RV
Polyurethane-based sealant. More expensive than Dicor but stronger bond and better UV resistance. Some techs prefer it for critical seals.
- Best for: high-stress areas, professional installations
- Cost: $18–$25 per tube
Sikaflex 715 / 221
Industrial-grade polyurethane sealants. Excellent for fiberglass repair and where you need serious adhesion. Overkill for typical membrane repair but the right choice for fiberglass roof work.
- Best for: fiberglass roofs, hard-to-seal transitions
- Cost: $12–$25 per tube
What NOT to use:
- Silicone caulk of any kind on membrane roofs. Silicone doesn’t bond to EPDM/TPO and it’s impossible to remove or cover with anything else later. This is the #1 mistake owners make. Do not use silicone on your roof.
- Roofing tar or asphalt sealants. Wrong chemistry for RV membranes.
- Random hardware-store caulks not rated for RV roofs.
The universal rule: apply new sealant over existing sealant only if the existing sealant is still bonded well. If the old sealant is cracked, peeling, or lifting, you need to remove it completely and apply new. Applying fresh sealant over compromised sealant just delays the failure by a few months.
DIY Roof Repair: What You Can Actually Do Yourself
Small repairs are within DIY reach for most owners. Big repairs are pro territory.
Realistic DIY jobs:
- Applying fresh Dicor around a penetration where the old sealant is cracked
- Emergency Eternabond patch over a tear or puncture
- Cleaning and re-sealing seams that show light cracking
- Filling small gaps with self-leveling sealant
- Removing and replacing dead sealant with fresh (if you’re comfortable with prep)
How to do a basic re-seal:
- Clean the area with a mild soap and water solution. Rinse and dry completely.
- Remove any cracked, peeling, or lifted sealant with a plastic scraper (never metal — you’ll damage the membrane).
- Wipe the area with denatured alcohol to remove any residue.
- Apply Dicor self-leveling in a smooth bead, covering the original sealant footprint by about 1/4″ on all sides.
- Let cure for 24 hours minimum before exposing to rain. Full cure is 4–8 days.
Pro territory:
- Any repair involving membrane replacement
- Any repair where you find soft decking
- Any repair where the leak source can’t be identified after inspection
- Fiberglass roof repair (requires resin, gel coat, and matching to existing finish)
- Full roof re-seal (labor-intensive and requires knowing what to remove)
- Roof replacement
The line between DIY and pro comes down to what’s under the membrane. If the decking is solid and you’re just refreshing sealant, DIY. If the decking might be compromised, get a professional evaluation before spending money on sealant that’s covering a bigger problem.
What RV Roof Repair Costs in 2026
Costs vary enormously by scope. Realistic 2026 ranges:
| Repair | Parts | Labor | Total |
|---|---|---|---|
| Spot sealant re-application (DIY) | $10 – $40 | $0 | $10 – $40 |
| Spot sealant re-application (pro) | $30 – $80 | $150 – $300 | $180 – $380 |
| Complete roof re-seal (all penetrations + seams) | $80 – $200 | $400 – $900 | $480 – $1,100 |
| EPDM/TPO patch repair (tear or puncture) | $30 – $150 | $200 – $500 | $230 – $650 |
| Small membrane replacement (partial) | $200 – $600 | $600 – $1,400 | $800 – $2,000 |
| Full EPDM/TPO membrane replacement | $2,000 – $5,000 | $2,000 – $4,500 | $4,000 – $9,500 |
| Fiberglass roof crack repair | $50 – $200 | $300 – $700 | $350 – $900 |
| Fiberglass gel coat refinishing | $300 – $1,200 | $800 – $2,500 | $1,100 – $3,700 |
| Roof decking replacement (partial) | $300 – $900 | $1,500 – $3,500 | $1,800 – $4,400 |
| Roof decking replacement (full) | $1,000 – $3,000 | $3,500 – $8,000 | $4,500 – $11,000 |
| Complete roof replacement | $3,500 – $10,000 | $4,000 – $10,000 | $7,500 – $20,000 |
Larger rigs (Class A, big fifth wheels) run at the upper end of these ranges. Metro markets add 15–30%. Mobile techs handle spot repairs and re-seals; full membrane replacement and decking work almost always requires a shop with roof access.
If you’re getting quoted anywhere near $10,000+, get a second and third opinion before authorizing. Roof work is one of the most inflated repair categories in the industry.
Insurance Claims for Roof Damage
RV insurance often covers roof damage from specific events — but not wear and tear.
Usually covered:
- Hail damage (often a covered peril; check your policy)
- Fallen branches and tree damage
- Vandalism
- Debris from wind or storms
- Collision-related roof damage
Usually not covered:
- Slow leaks from failed sealant (wear and tear)
- Age-related membrane failure
- Damage caused by neglected maintenance
- Manufacturing defects (that’s a warranty claim, not insurance)
If you have hail or storm damage:
- Document everything with photos before touching anything. Timestamped photos of hail on the ground, weather reports from the day, and clear roof damage photos.
- Contact your insurance immediately — most policies have reporting time limits.
- Get an independent estimate before or during the insurance adjuster’s visit. Insurance adjusters often lowball; a written independent estimate gives you negotiating leverage.
- Know your deductible. For minor damage, filing may not be worth it. For hail totaling the roof, definitely file.
- Don’t accept a “cash out” settlement before understanding real repair costs. Insurance’s number is often below what the actual repair costs.
Full coverage of RV insurance claims deserves its own guide — this section is the overview.
Frequently Asked Questions
How often should I inspect my RV roof?
Twice a year minimum (spring and fall) for regular use. Before every long trip. After any severe weather event. Full-timers should inspect quarterly.
How long does an RV roof last?
EPDM membranes typically last 10–20 years with proper maintenance. TPO usually 15–25 years. Fiberglass can last the life of the rig if maintained. Neglected roofs of any type fail dramatically sooner.
Can I use silicone caulk on my RV roof?
No. Silicone doesn’t bond to EPDM or TPO, doesn’t allow overcoating with other sealants, and is nearly impossible to remove. Using silicone on an RV roof is one of the most costly common mistakes in ownership.
What’s the difference between EPDM and TPO?
Both are membrane roofs but different chemistry. EPDM is rubber-based, more flexible, more forgiving to repair. TPO is thermoplastic, more UV-resistant, welds at seams instead of mechanical sealing. Newer RVs mostly use TPO; older ones use EPDM. Repair products for one don’t always work on the other.
How do I know if my roof needs to be resealed?
Inspect it. If any sealant is cracked, peeling, lifted, discolored, or gapped, it needs attention. A full-roof reseal typically becomes worthwhile every 3–5 years even if no obvious problems exist — it’s cheap insurance against future leaks.
Can I walk on my RV roof?
Depends on the roof type, the RV type, and your weight. Class A motorhomes with fiberglass roofs typically support full walking weight. Membrane roofs on travel trailers vary — check your manual and the rig’s rated capacity. Distribute weight across the roof structure, not on unsupported spans.
What causes RV roof leaks most often?
Failed sealant around penetrations, in that order:
- Around the air conditioner
- Around roof vents
- At front and rear cap seams
- Around antennas and satellite mounts
- At slide-out toppers (if equipped)
Membrane failure itself is far less common than sealant failure.
How much does full RV roof replacement cost?
$7,500–$20,000 depending on RV size, roof type, and whether decking replacement is needed. For rigs under 10 years old, decking is usually still solid and only the membrane needs replacement — significantly cheaper. For older or long-leaking rigs, full decking replacement can push costs well beyond the rig’s value.
Should I have my roof professionally inspected?
If you’re buying a used RV, absolutely — a pre-purchase inspection should include a thorough roof assessment. For owned rigs, a professional inspection every 3–5 years is smart insurance. Between professional inspections, do the 15-minute inspection yourself.
What’s the best sealant for RV roofs?
Depends on roof type and application. For most owners with EPDM or TPO: Dicor self-leveling for horizontal, Dicor non-sag for vertical, Eternabond tape for emergency repairs and long-term seam protection. For fiberglass: Sikaflex products. Avoid silicone at all costs.
Bottom line: Your RV roof is the most important system on the rig — and the cheapest to maintain if you’re proactive. A 15-minute inspection twice a year and a $30 tube of Dicor when you find early signs of trouble will prevent 95% of the disasters. Neglect the roof and it will cost you thousands. This is the single highest-ROI maintenance activity in RV ownership. Do it.
Roof problem beyond DIY?
Search the RV Repair Lab directory for Lab-Vetted mobile techs and shops that specialize in roof repair, water damage assessment, and re-seals. Filter by roof type and repair scope.
[Find a roof specialist near you →]
In a hurry?
Skip the diagnostic → Find a mobile tech near you