
RV Water Pump Replacement: Diagnose & Fix Guide (2026)
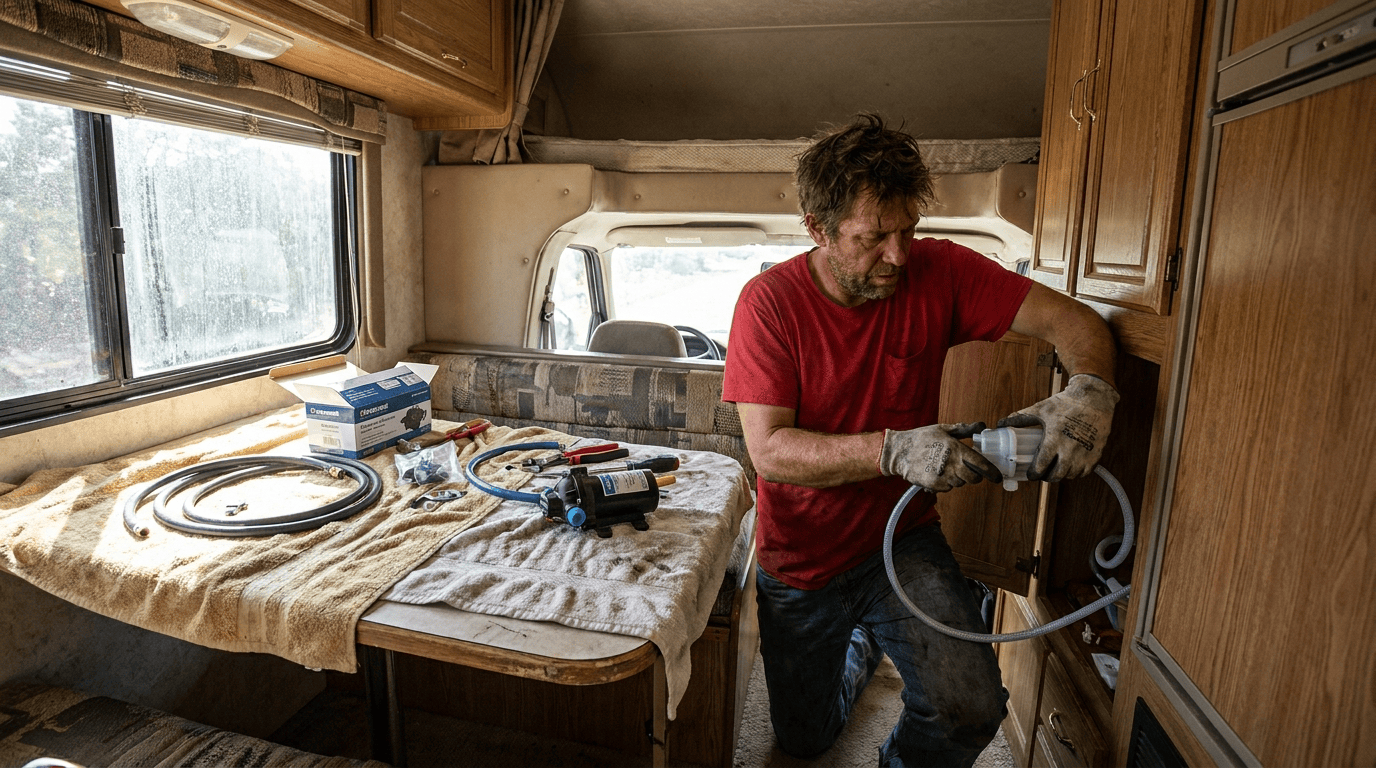
Diagnose Leaking, Won’t Prime, or Keeps Running
The water pump is one of those RV components you never think about until it stops working. It sits under a couch or in a storage bay, quietly pressurizing your water system whenever you turn on a faucet. And then one day you turn on the tap and get a trickle. Or the pump runs constantly even when no water is flowing. Or you notice water pooling under the coach and trace it back to a wet pump housing.
The good news: RV water pump problems are among the most straightforward RV repairs. Diagnosis takes about 15 minutes. Replacement is genuinely DIY-friendly for anyone with basic mechanical skills. Total parts cost is usually $60-$120. And the failure modes are limited enough that troubleshooting is systematic.
This guide walks through the three most common water pump problems — leaking, won’t prime, and won’t stop running — plus how to diagnose which one you actually have, how to fix each, and what real replacement costs in 2026 whether you DIY or hire out.
First: Know What Kind of Pump You Have
Nearly all modern RVs use a 12V DC diaphragm pump — a small self-priming pump that pressurizes the water system on demand. The most common brands:
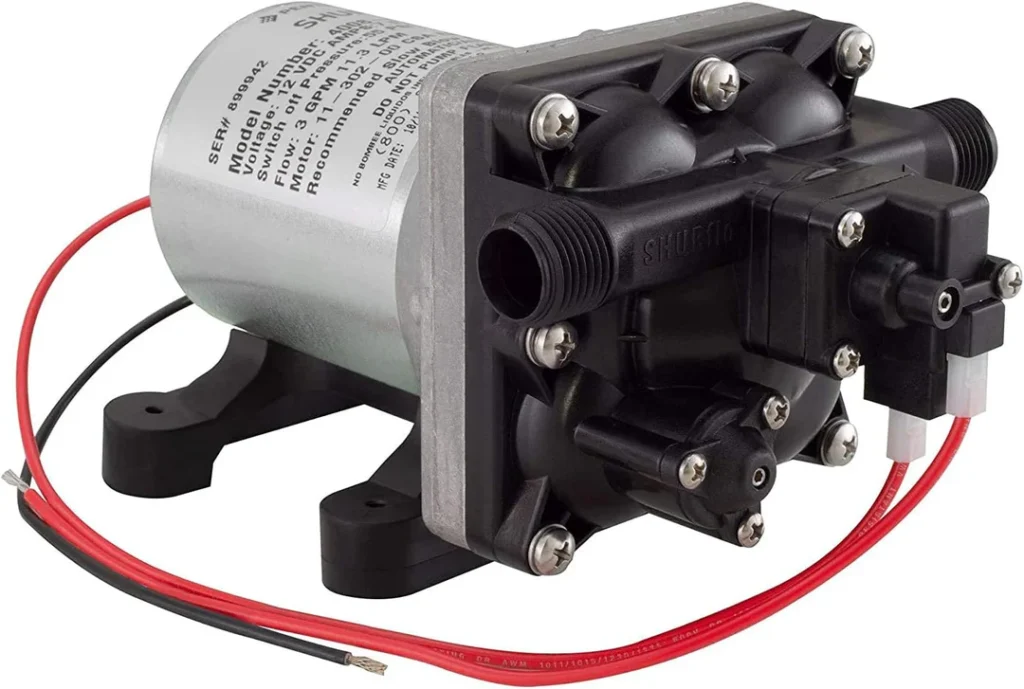
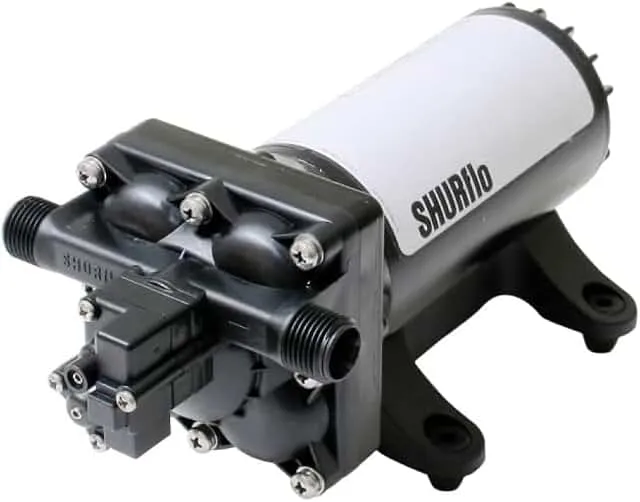
- Shurflo— (owned by Pentair) — the industry standard.
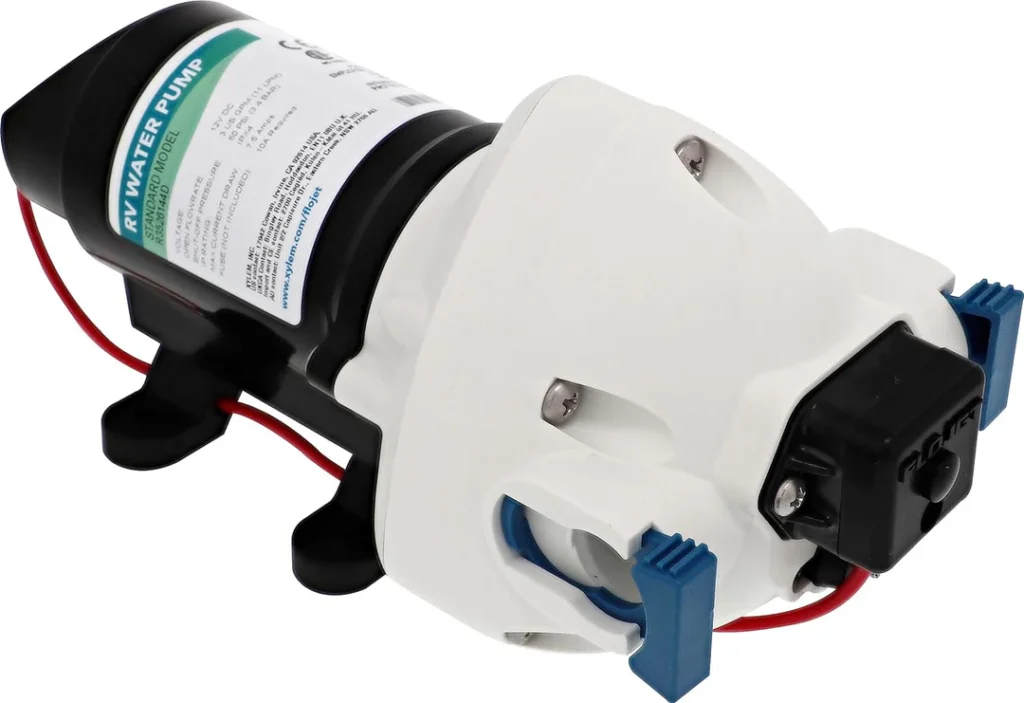
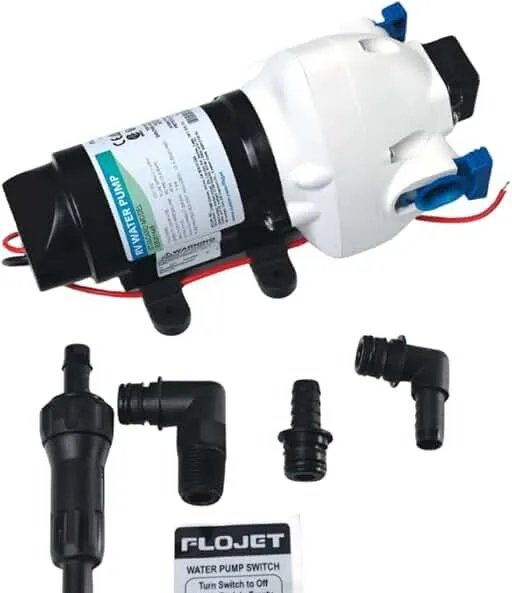
- Flojet– competitor to Shurflo, similar performance, slightly different design.
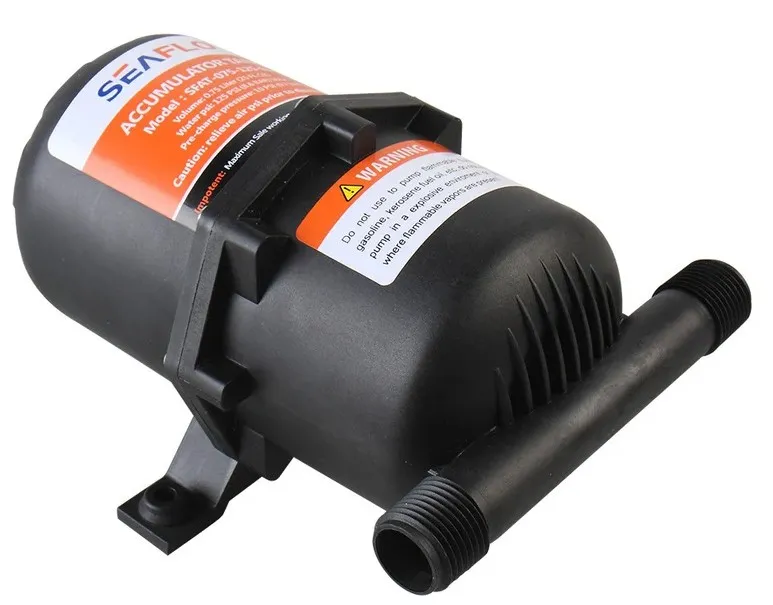
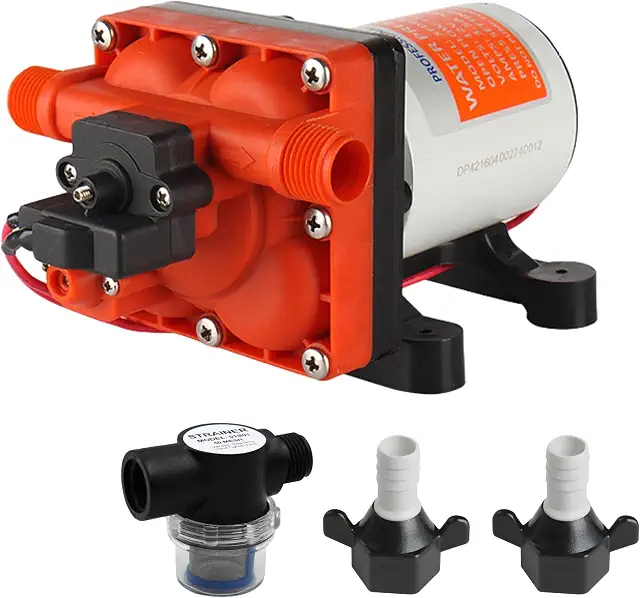
- Sea-Flo — budget option often used on lower-priced rigs.
All work on the same principle: a small electric motor drives a diaphragm that pushes water through the system when a faucet opens. A built-in pressure switch turns the pump on when pressure drops (faucet opens) and off when pressure builds back up (faucet closes or system is pressurized).
Identifying yours:
- Usually mounted in a storage bay, under a bench seat, or in a plumbing compartment
- Small cylindrical or rectangular device, typically 4-8 inches long
- Two water hose connections (inlet and outlet) plus power wires
- Brand name printed on the housing
Pump flow rates commonly range from 3.0 GPM to 5.3 GPM (gallons per minute). Higher-end rigs use higher-flow pumps.
Symptom 1: Pump Runs But No Water (Won’t Prime)
You turn on a faucet, the pump kicks on, but only air or a trickle comes out. The pump can’t build pressure because it’s not moving water.
Most common causes (in order of likelihood):
1. Fresh water tank is empty or too low. Sounds obvious, but this is the #1 cause. If your tank is under 10-15% full and the pump inlet isn’t submerged, the pump sucks air instead of water.
2. Air in the water lines. After winterizing, sitting for weeks, or opening the system, air gets trapped in the lines. The pump has to push that air out before it can move water effectively.
3. Bypass valves in wrong position. If your rig was winterized, the bypass valves that route water around the water heater may still be positioned for antifreeze bypass — preventing normal water flow.
4. Water pump filter clogged. Most pumps have an inline strainer filter on the inlet side. Debris, sediment, or ice damage can block it.
5. Suction leak in inlet plumbing. A crack or loose fitting on the inlet side lets the pump suck air instead of water. Even a small crack causes total priming failure.
6. Pump diaphragm failure. Older pumps develop torn or worn diaphragms that can’t create suction. Pump runs but doesn’t move water.
7. One-way check valve stuck. The pump has internal check valves. If one sticks, water can’t flow properly.
8. Frozen line somewhere in the system. In cold weather, a frozen section between the tank and pump prevents water flow.
The Priming Diagnostic Procedure
Run this in order:
1. Check tank level. Look at the tank monitor or physically check the tank. Add water if below 25%.
2. Verify bypass valves. Look at the bypass valves under the sink or wherever your water heater access is. All should be in the normal (non-bypass) position — parallel with the pipes, not perpendicular.
3. Turn on all faucets to prime. Open the highest faucet in the coach (usually a bathroom sink or shower). Turn on the pump. Water should flow within 30-60 seconds as air is pushed out.
4. Try each faucet. Sometimes only certain faucets work while others don’t — indicates a specific line issue rather than pump failure.
5. Check the pump filter. Turn off the pump. Locate the inline strainer on the pump’s inlet side (usually a clear plastic housing you can unscrew). Remove and inspect for debris. Clean or replace as needed.
6. Listen to the pump. A pump trying to prime sounds different than a pump that’s moving water. Struggling, higher-pitched, or straining sounds indicate suction problems. Smooth, consistent operation indicates the pump is working — problem is downstream.
7. Check for suction leaks. Feel the inlet line and fittings between the tank and pump while the pump runs. Any wet spots or hissing indicates air being sucked in.
8. Try a manual prime. Some pumps prime faster if you disconnect the outlet, run water through the inlet with a hose, then reconnect. This forces water into the pump chamber.
If steps 1-8 don’t resolve the issue, the pump itself has likely failed internally. Time to replace.
Symptom 2: Pump Keeps Running (Won’t Turn Off)
Water pressure is fine, but the pump cycles constantly or never turns off. This drains battery, wears the pump, and is annoying.
Most common causes:
1. Small leak somewhere in the water system. Even a slow drip drops system pressure enough to trigger the pump. This is by far the #1 cause.
2. Toilet valve leaking. Toilet fill valves are notorious for slow leaks. If your pump kicks on periodically without any faucet running, check the toilet.
3. Water heater T&P valve dripping. Thermal expansion or a failing T&P valve can drip constantly, keeping the pump cycling.
4. Faucet not fully closed. Someone left a faucet slightly on, or a faucet has a slow drip.
5. Failed pressure switch. The pump’s built-in pressure switch that tells it when to stop can fail — pump keeps trying to build pressure that’s already there.
6. Accumulator tank issues. Some rigs have accumulator tanks that smooth pressure. A failed accumulator can cause constant cycling.
7. External water source connected wrong. If you’re on city water and the check valve failed, city pressure can leak back into the system.
8. Fresh water tank overflow issue. Rare but possible — malfunctioning tank fill can trigger pump behavior.
The Cycling Diagnostic Procedure
1. Check every faucet visually. Kitchen, bathroom sink, shower, outdoor shower. Confirm all are completely off. Look and listen for drips.
2. Turn off the pump. Wait 5 minutes. Then turn on any faucet briefly. If the pump had been running because of a leak, the pressure will have dropped noticeably — the pump will run longer to re-pressurize.
3. Check the toilet. Flush and let it fill completely. Then listen carefully for any hissing or dripping sounds inside the toilet. Slow leaks in toilet valves are common.
4. Check the water heater. Look at the T&P valve. If it’s dripping or actively releasing water, replace it.
5. Check exterior water hookups. Even if not currently in use, faulty check valves can leak.
6. Test the pressure switch directly. With the pump off and all faucets closed, disconnect power to the pump. Reconnect. If the pump cycles on immediately (indicating pressure loss), you have a leak somewhere. If it doesn’t cycle, the pressure switch is likely failing.
7. Check under the RV. Walk around and look for any wet spots or water pooling under the coach. Water damage compounds over time.
8. Test pump duty cycle. Time how long between cycles. If the pump kicks on every 30 seconds without any water use, you have an active leak. If it kicks on every 30 minutes, it’s probably a slow leak worth finding but not urgent.
Symptom 3: Water Pump Is Leaking
You see water pooling around the pump or feel the pump housing wet when it runs.
Most common causes:
1. Loose fittings. Inlet or outlet water line fittings loosening from vibration. Very common; easy fix.
2. Cracked pump housing. Freeze damage cracks the pump body. Common in rigs that weren’t properly winterized.
3. Diaphragm rupture. The internal rubber diaphragm tears or develops holes, letting water escape from the pump body.
4. Cracked pump housing from age. Plastic pump housings can crack over 8-10+ years of use.
5. Loose pressure switch. The pressure switch on the pump can loosen and leak from its connection point.
6. Failed check valve seal. Internal check valve seals can fail, causing leaks.
The Leak Diagnostic Procedure
1. Identify exactly where the water is coming from. Turn on the pump briefly. Watch the pump housing and connections. Note the specific location of the leak.
2. Check both fittings. Tighten the inlet and outlet water line connections. Sometimes just this fixes the leak. Use two wrenches — one on the fitting, one on the pump body — to avoid stressing the pump housing.
3. Inspect the pump housing for cracks. Look for visible cracks in the plastic, especially around the water passages. Freeze damage typically appears as radial cracks or star patterns.
4. Check the diaphragm access panel. Some pumps have removable access to the diaphragm chamber. If leaking from a diaphragm chamber seal, the diaphragm or gasket needs replacement.
5. Check the pressure switch. Look for water at the pressure switch mounting point.
6. Look at all pump-related components. Some leaks trace to nearby fittings rather than the pump itself.
If the leak is from a fitting, tighten and monitor. If from the pump housing itself, replacement is usually the right call — repair kits exist for some pump models but are often not worth the time versus a full replacement at $60-$120.
Repair vs Replace Decision
Most water pump problems can be repaired at the component level, but replacement is often the better move:
When repair makes sense:
- Small leak from a loose fitting — just tighten
- Bad pump filter — clean or replace ($5-$15)
- Failed pressure switch on a newer pump — replacement switch is $15-$30
- Bad check valve — repair kits available for common brands ($20-$40)
- Debris blocking the pump — clean it out
When replacement makes sense:
- Pump is 5+ years old and has any significant issue
- Pump housing is cracked
- Diaphragm is torn (repair kit exists but full replacement often cheaper)
- Multiple issues on the same pump
- You want to upgrade capacity (going from 3.0 GPM to 4.0 GPM+ pump)
The 5-Year Rule: If your pump is over 5 years old and having problems, just replace it. New pumps are $60-$120, they last 5-10 years, and you save yourself repeated troubleshooting on old components.
Choosing a Replacement Pump
The main considerations when picking a replacement:
Flow rate: How much water the pump moves. Common ratings:
- 3.0 GPM — small trailers, low water use
- 3.5 GPM — most standard travel trailers
- 4.0 GPM — larger trailers, fifth wheels
- 4.5-5.3 GPM — Class A motorhomes, high-end rigs
Higher flow = better shower experience, faster filling. Higher flow also = more current draw and slightly more noise.
Pressure rating (PSI): How much pressure the pump builds. 45-55 PSI is standard for RV use. Higher rated pumps (55+ PSI) provide better shower spray but stress older plumbing.
Duty cycle: Whether the pump can run continuously. Standard RV pumps are intermittent-duty (short bursts). Continuous-duty pumps ($150+) are for heavy commercial use.
Noise level: Higher-quality pumps run quieter. Shurflo Revolution series and similar premium pumps are noticeably quieter than budget alternatives.
Amp draw: Pumps typically draw 3-8 amps at 12V. Higher-flow pumps draw more. Important for boondockers watching battery consumption.
Brand recommendations:
- Shurflo 4048 Revolution — industry standard, reliable, 3.0 GPM, quieter than older models. $100-$130.
- Shurflo 4008-171-E65 — the classic — 3.0 GPM, well-proven. $75-$100.
- Flojet 03526-144A — comparable to Shurflo 4008, sometimes cheaper. $70-$100.
- Whale WMD1216 — European, high-quality, quieter. $130-$160.
- Sea-Flo SFDP3.0-045-055 — budget option. $50-$80. Lower quality but functional.
For most RV owners, the Shurflo 4048 Revolution is the right upgrade choice — quieter, reliable, similar price to older 4008 models.
The DIY Replacement Procedure
Water pump replacement is one of the most DIY-friendly RV repairs. Total time: 30-90 minutes depending on access.
What you’ll need:
- New water pump
- Adjustable wrench or channel-lock pliers
- Screwdriver (Phillips and flat-head)
- Teflon tape or thread sealant
- Bucket or towels
- New inline strainer filter (if not included with pump)
- Optional: sanitizing solution for the water system
Step-by-step:
1. Turn off water pump power. Locate the pump’s power switch (usually inside the coach on a panel). Turn it off. Also disconnect the fuse or breaker for the pump circuit as a safety measure.
2. Turn off water supply. Disconnect city water hookup if connected. Ensure the fresh water tank valve is closed if accessible.
3. Depressurize the system. Turn on the highest faucet in the coach. Water will drain out until pressure is released.
4. Locate and access the pump. Find your pump. Depending on RV layout, this might require removing a bench seat, opening a storage bay door, or removing a panel.
5. Take a photo. Before disconnecting anything, photograph the pump installation showing all wire and hose connections. This is your reference for reassembly.
6. Disconnect power wires. Note which wire is positive (usually red) and which is negative (usually black). Loosen connections and set wires aside.
7. Disconnect water hoses. Have your bucket ready — some water will spill. Loosen the inlet hose first (side with the strainer filter), then the outlet hose. Both use standard hose clamps or threaded fittings depending on your setup.
8. Remove pump mounting. Water pumps are usually held in place with 2-4 screws to a base plate. Remove screws and lift out the pump.
9. Prep the new pump. Compare to the old pump — same connections, same orientation. Install any necessary fittings on the new pump using Teflon tape on threaded connections.
10. Install new pump. Position in the same mounting location. Secure with screws.
11. Connect water hoses. Inlet hose to inlet fitting (side with strainer). Outlet hose to outlet fitting. Tighten hose clamps securely.
12. Connect power wires. Positive to positive, negative to negative. Ensure tight, secure connections.
13. Verify all connections. Double-check that all fittings are tight and secure. Verify the pump is oriented correctly (usually flow direction is marked).
14. Turn on power. Restore power at the fuse/breaker. Then turn on the pump switch.
15. Test. Turn on a faucet. The pump should kick on and water should flow within 30-60 seconds as air is pushed through. Once water is flowing normally, cycle each faucet on and off to verify pressure and function.
16. Check for leaks. Feel around all connections and the pump body. Look for any wet spots.
17. Sanitize (optional). After replacement, some owners sanitize the system by adding a hydrogen peroxide or bleach solution to the fresh water tank, running it through the pump, and flushing. This ensures no debris or bacteria contamination during the swap.
18. Test at full pressure. Let the pump build to full pressure. Verify it turns off when pressure reaches the target. Verify it turns back on when water is drawn.
Total elapsed time for a first-timer: 45-90 minutes. Experienced DIYers finish in 20-30 minutes.
Common DIY Replacement Mistakes
Watching for these prevents most DIY headaches:
Cross-threading fittings. Water pump fittings use standard NPT thread. If you’re forcing threads, they’re crossing. Back off completely and restart carefully.
Skipping Teflon tape. Any threaded fitting needs 2-3 wraps of Teflon tape on the threads. Skip this and you’ll get leaks.
Reversing inlet and outlet. The pump has directional flow. Make sure inlet is inlet and outlet is outlet — look for the flow arrow on the pump body.
Loose hose clamps. Hose clamps need to be genuinely tight. Loose = leaks. But over-tightening can crush plastic barbed fittings — snug but not crushed.
Not checking power wire polarity. Some pumps run backward if wired wrong. Verify positive to positive.
Forgetting to test at full pressure. Some leaks only show at operating pressure. Let the system build to full pressure and check thoroughly.
Not checking the inline filter. New pump won’t work well if you keep the old, dirty filter. Replace or thoroughly clean the strainer.
Hiring It Out: What It Costs
If DIY isn’t your thing, water pump replacement is straightforward professional work:
| Service | Total Cost |
|---|---|
| Mobile RV tech: diagnostic + pump replacement | $200 – $400 |
| Mobile RV tech: parts + labor for standard pump | $250 – $500 |
| Independent shop: pump replacement (bring rig in) | $200 – $450 |
| Dealership service: pump replacement | $350 – $700 |
Mobile tech is usually the best choice — they come to your rig, replacement takes 30-60 minutes, and total cost including parts is typically under $400 for a standard pump.
2026 Cost Breakdown
Real 2026 pricing for pump-related work:
| Repair | Parts | Labor | Total |
|---|---|---|---|
| Pump filter replacement | $5 – $15 | $50 – $100 | $55 – $115 |
| Pressure switch replacement | $15 – $30 | $80 – $150 | $95 – $180 |
| Check valve repair kit | $20 – $40 | $80 – $150 | $100 – $190 |
| Complete pump replacement (Shurflo 4008) | $75 – $100 | $150 – $250 | $225 – $350 |
| Complete pump replacement (Shurflo Revolution) | $100 – $130 | $150 – $250 | $250 – $380 |
| Complete pump replacement (upgrade to higher flow) | $130 – $180 | $150 – $300 | $280 – $480 |
| Accumulator tank installation | $80 – $150 | $150 – $250 | $230 – $400 |
| Diaphragm rebuild (repair kit) | $25 – $50 | $100 – $200 | $125 – $250 |
DIY parts-only cost typically $60-$150 depending on pump chosen.
Preventive Maintenance
Water pumps last dramatically longer with basic maintenance:
Annually:
- Clean or replace the inline strainer filter
- Check all fittings for tightness
- Verify pump is mounted securely (vibration loosens mounts over time)
- Sanitize the water system
Before winter storage:
- Complete winterization is critical — freeze damage cracks pump housings
- Either drain fully and blow out lines with compressed air, or fill with RV antifreeze
Every 2-3 years:
- Consider replacement if pump is running noisier or drawing more amps than when new
- Test pressure switch function
When issues arise:
- Address small leaks immediately (they never get better on their own)
- Diagnose priming issues before they compound
- Don’t ignore constant cycling (indicates a leak somewhere costing you battery)
Missed winterization is the #1 way water pumps die. Take it seriously.
Frequently Asked Questions
How much does an RV water pump cost to replace?
DIY: $60-$150 in parts. Professional: $200-$500 depending on pump chosen and technician type. Mobile RV tech is usually the best-value professional option.
How long does an RV water pump last?
Well-maintained pumps typically last 5-10 years. Neglected pumps (missed winterization, ignored small leaks) can fail in 2-3 years. Extended winterization negligence commonly kills pumps in a single winter.
Can I replace an RV water pump myself?
Yes. Water pump replacement is one of the most DIY-friendly RV repairs. Takes 30-90 minutes for a first-timer with basic tools. No specialized skills required beyond wrench turning and plumbing connections.
What’s the difference between Shurflo 4008 and Revolution?
Both are 3.0 GPM pumps. The Revolution runs significantly quieter, has updated internals, and is generally considered the modern replacement for the classic 4008. Cost difference is $30-$50. For most owners, Revolution is worth the upgrade.
Why does my water pump keep running when nothing is on?
Something is leaking. Even a slow drip drops pressure enough to trigger the pump. Check every faucet (including outdoor showers), the toilet, and the water heater T&P valve. Also check for wet spots under the coach.
Why won’t my water pump prime?
Most commonly: empty or too-low fresh water tank, air in the lines, bypass valves still in winterization position, clogged inline filter, or air leak in the inlet plumbing. Run through the diagnostic procedure above in order.
Why is my water pump leaking?
Most commonly: loose fittings (tighten them), cracked pump housing from freeze damage (replacement needed), failed diaphragm (repair kit or replacement), or failed pressure switch (replace the switch).
Should I upgrade my water pump when replacing?
If your current pump is 3.0 GPM and you’re often disappointed by shower pressure or slow water flow, yes — upgrade to 4.0 GPM or higher. Cost difference is minimal ($30-$60), and the improvement in daily experience is significant.
Do I need an accumulator tank?
Not required, but nice to have. An accumulator tank smooths out pump cycling and reduces water pulsing. Cost: $50-$120 for the tank. Improves comfort during showers and reduces pump wear.
How often should I sanitize my water system after pump replacement?
Sanitize the system after any pump replacement or if the system has sat unused for months. Use hydrogen peroxide (safer) or a small amount of household bleach (more effective). Follow product instructions and thoroughly flush the system afterward.
Can I use a Shurflo Revolution to replace a Flojet?
Yes, in most cases. RV water pumps are largely interchangeable across brands. Verify the mounting footprint matches or use adapter fittings. Confirm your electrical system matches the pump’s specifications (12V DC standard).
What if my new pump is louder than my old one?
Common with budget pumps. Also might indicate improper mounting (pump not seated firmly), incorrect installation orientation, or a faulty pump. Try re-mounting first, verify orientation, then contact the manufacturer if it persists.
Does an RV water pump need a filter?
Yes. All modern pumps use an inline strainer filter to prevent debris from damaging the pump internals. Never operate without one. Filters need cleaning or replacement every 6-12 months.
Should I replace the check valve when replacing the pump?
Not required, but often smart. Check valves on many pumps have been redesigned and improved over the years. Replacing during pump swap costs $10-$20 in parts and prevents a potential future failure.
Bottom line: RV water pump problems are among the most straightforward RV repairs. Three symptoms cover 90% of issues — won’t prime, keeps running, or leaking — and each has a systematic diagnostic. DIY replacement takes 30-90 minutes with basic tools. Professional replacement runs $200-$500. Prevention (proper winterization and annual filter service) is what keeps pumps alive for 8-10 years vs. 3-4 years.
Beyond DIY?
Search the RV Repair Lab directory for Lab-Vetted mobile techs and shops that handle water pump replacement. Most jobs can be completed by mobile techs at your location in an hour or less.
[Find a plumbing specialist near you →]