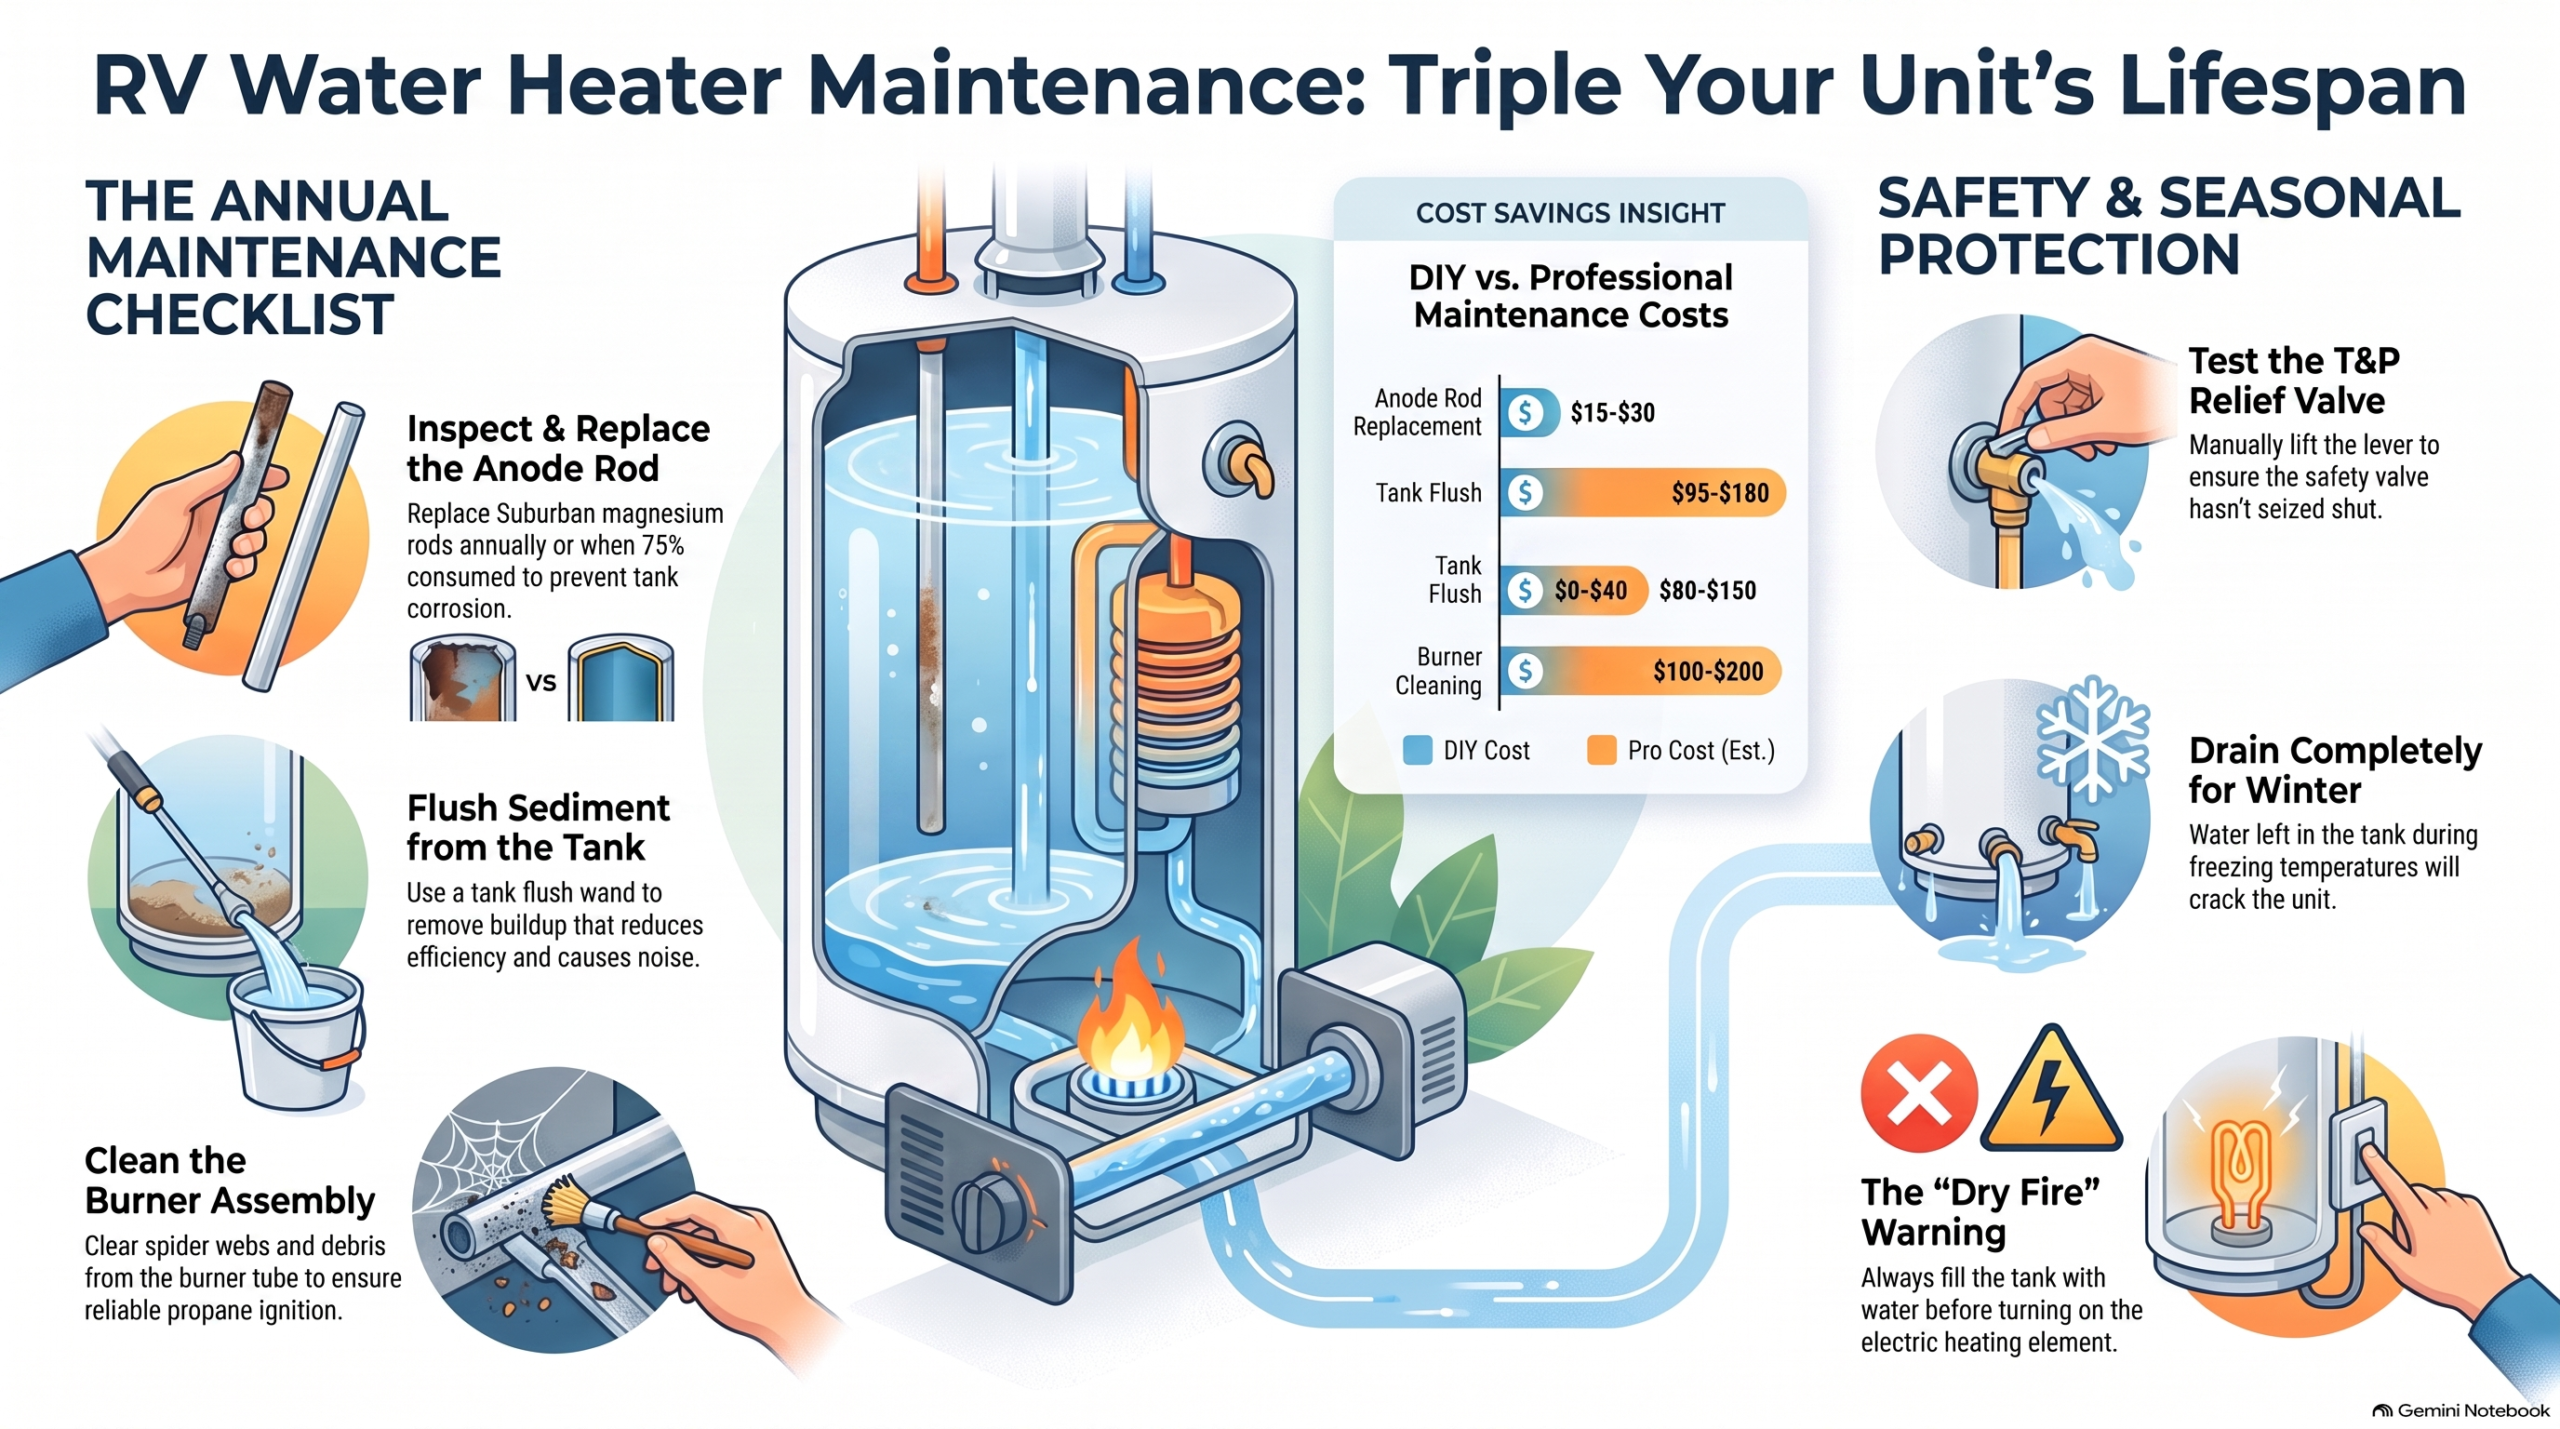
RV Water Heater Maintenance: The Annual Checklist (2026)
Most RV water heater failures are preventable. The units that get replaced at 4–6 years are usually the ones that never had their anode rod checked, never had their burner cleaned, and spent a winter with water in the tank. The ones that reach 12–15 years all got the same basic maintenance.
This is the annual maintenance checklist for RV water heaters — covering Suburban, Atwood/Dometic, and tankless units. Most of it takes under an hour and costs nothing.
Know Your Water Heater Type First
Maintenance varies by manufacturer and type, so identifying your unit before starting matters.
- Suburban: Traditional RV standard. Steel tank with an anode rod. Runs propane and/or 120V electric. Brand name on exterior door. Most common model series: SW6, SW10, SW12.
- Atwood / Dometic: Aluminum-lined tank, no anode rod. Plastic drain plug instead. Common models: GC6AA, GC10A, Dometic successors. No anode to maintain.
- Tankless (Truma AquaGo, Girard, Furrion): No tank, heats on demand. Different maintenance requirements — especially descaling on Truma units.
Annual Maintenance Checklist
1. Inspect and Replace the Anode Rod (Suburban Only)
Frequency: Annually, or when more than 75% consumed.
The anode rod is a sacrificial magnesium bar threaded into the bottom of Suburban tanks. It corrodes instead of the tank. When it’s gone, the tank corrodes instead.
What you need: 1-1/16″ socket, breaker bar, Teflon tape, replacement rod ($15–$30). The job takes 20–30 minutes with the tank cool and drained. See our full anode rod replacement guide for step-by-step instructions.
2. Flush the Tank
Frequency: Annually (easiest to combine with anode rod replacement on Suburban units).
Sediment accumulates in all tank-based water heaters — Suburban and Atwood/Dometic alike. Over time it reduces efficiency, causes the popping/knocking sounds some owners hear, and contributes to tank corrosion.
Suburban: With the anode rod removed, insert a tank flush wand ($20–$40) and run water through until it runs clear. This is the easiest time since the tank is already draining.
Atwood/Dometic: Remove the plastic drain plug, flush with a wand or let gravity drain do the work, then flush fresh water through the T&P valve opening.
3. Clean the Burner Assembly (Propane)
Frequency: Annually, or any time propane ignition is slow or unreliable.
Spider webs are the #1 propane ignition problem for RV water heaters — spiders are attracted to the smell of mercaptan (the propane additive) and build webs inside the burner tube. A blocked burner causes failed ignition, yellow flame, or incomplete combustion.
Procedure:
- Turn off propane and the water heater
- Open the exterior access door
- Inspect the burner tube with a flashlight
- Clear any webs or debris by hand, then use compressed air in short bursts
- Wipe the flame sensor clean with a soft cloth
- Check for correct blue flame color on next ignition — yellow or orange indicates partial obstruction
Adding a bug screen over the burner intake is a $10–$15 upgrade that dramatically reduces this problem.
4. Test the T&P Relief Valve
Frequency: Annually.
The temperature and pressure relief valve is a safety device that opens if the tank reaches dangerous pressure. It needs to be tested to confirm it still operates (T&P valves can seize in the closed position over time, which means they won’t protect you in a pressure event).
Manually lift the lever briefly — you should see water or steam discharge from the relief tube. If the valve won’t open, or if it leaks continuously after being opened, replace it. T&P valves are $20–$40 and a straightforward thread-in replacement.
5. Inspect for Corrosion and Leaks
Frequency: Annually (and any time you see wet spots near the water heater compartment).
- Check the exterior access compartment for rust staining or mineral deposits on the tank exterior
- Inspect the anode rod threads (Suburban) or drain plug (Atwood) for seeping
- Check the T&P valve discharge tube for signs of regular dripping
- Look at the inlet and outlet water connections for fitting corrosion
6. Truma AquaGo Descaling (Tankless-Specific)
Frequency: Annually (Truma recommends this without exception).
Truma AquaGo units develop mineral scale inside the heat exchanger over time — especially in areas with hard water. Truma’s official descaling procedure uses a citric acid solution circulated through the unit and takes about an hour with a Truma Descaling Kit ($25–$40).
Skipping this on a Truma unit is the most common reason for premature heat exchanger failure — a repair that can cost $400–$800.
Girard and Furrion tankless units don’t have the same formal descaling procedure, but should be inspected annually by a tech familiar with the specific brand.
Seasonal Maintenance: Before Storage
Missed winterization is one of the top three causes of water heater failure. Water left in a tank that freezes expands and cracks the tank or fittings — and that’s a replacement, not a repair.
- Drain the tank completely before freezing temperatures hit
- Open the T&P valve to ensure it fully drains
- Put the water heater in bypass mode so antifreeze doesn’t fill the tank (wastes antifreeze, damages some elements)
- Never leave the anode rod partially loosened during storage — it will leak
Seasonal Maintenance: Spring Startup
- Move all bypass valves back to normal position
- Fill tank completely before turning on the electric element — running it dry blows the thermal fuse instantly
- Open a hot water faucet to bleed air while filling
- Run hot water for 60 seconds to flush any residual antifreeze from the tank
- Check the anode rod if it’s been more than a year since last replacement
Annual Maintenance Cost Summary
| Task | DIY Cost | Pro Cost |
|---|---|---|
| Anode rod replacement (Suburban) | $15–$30 | $95–$180 |
| Tank flush | $0–$40 (wand) | $80–$150 |
| Burner cleaning | $0 | $100–$200 |
| T&P valve test | $0 | Included in service call |
| T&P valve replacement (if needed) | $20–$40 | $120–$220 |
| Truma descaling kit | $25–$40 | $150–$300 |
| Full annual service (pro) | N/A | $200–$400 |
Bottom line: RV water heater maintenance is 30–60 minutes once a year and costs $15–$40 in parts. Suburban owners: replace the anode rod and flush the tank. All types: clean the burner and test the T&P valve. Truma owners: descale annually. Winterize every single year without exception. That maintenance plan is the difference between a water heater that lasts 12 years and one that needs replacing at 5.
Need a professional annual service?
Find a Lab-Vetted shop or mobile tech near you who offers RV appliance maintenance services.